Macgyvering a li-ion charger
I'm going on a trip I expect to be a little sentimental, and I find my old sentiment-capturing-device-with-just-enough-embedded-nostalgia. It's served me well on a dozen trips, and I like something physical - you know?
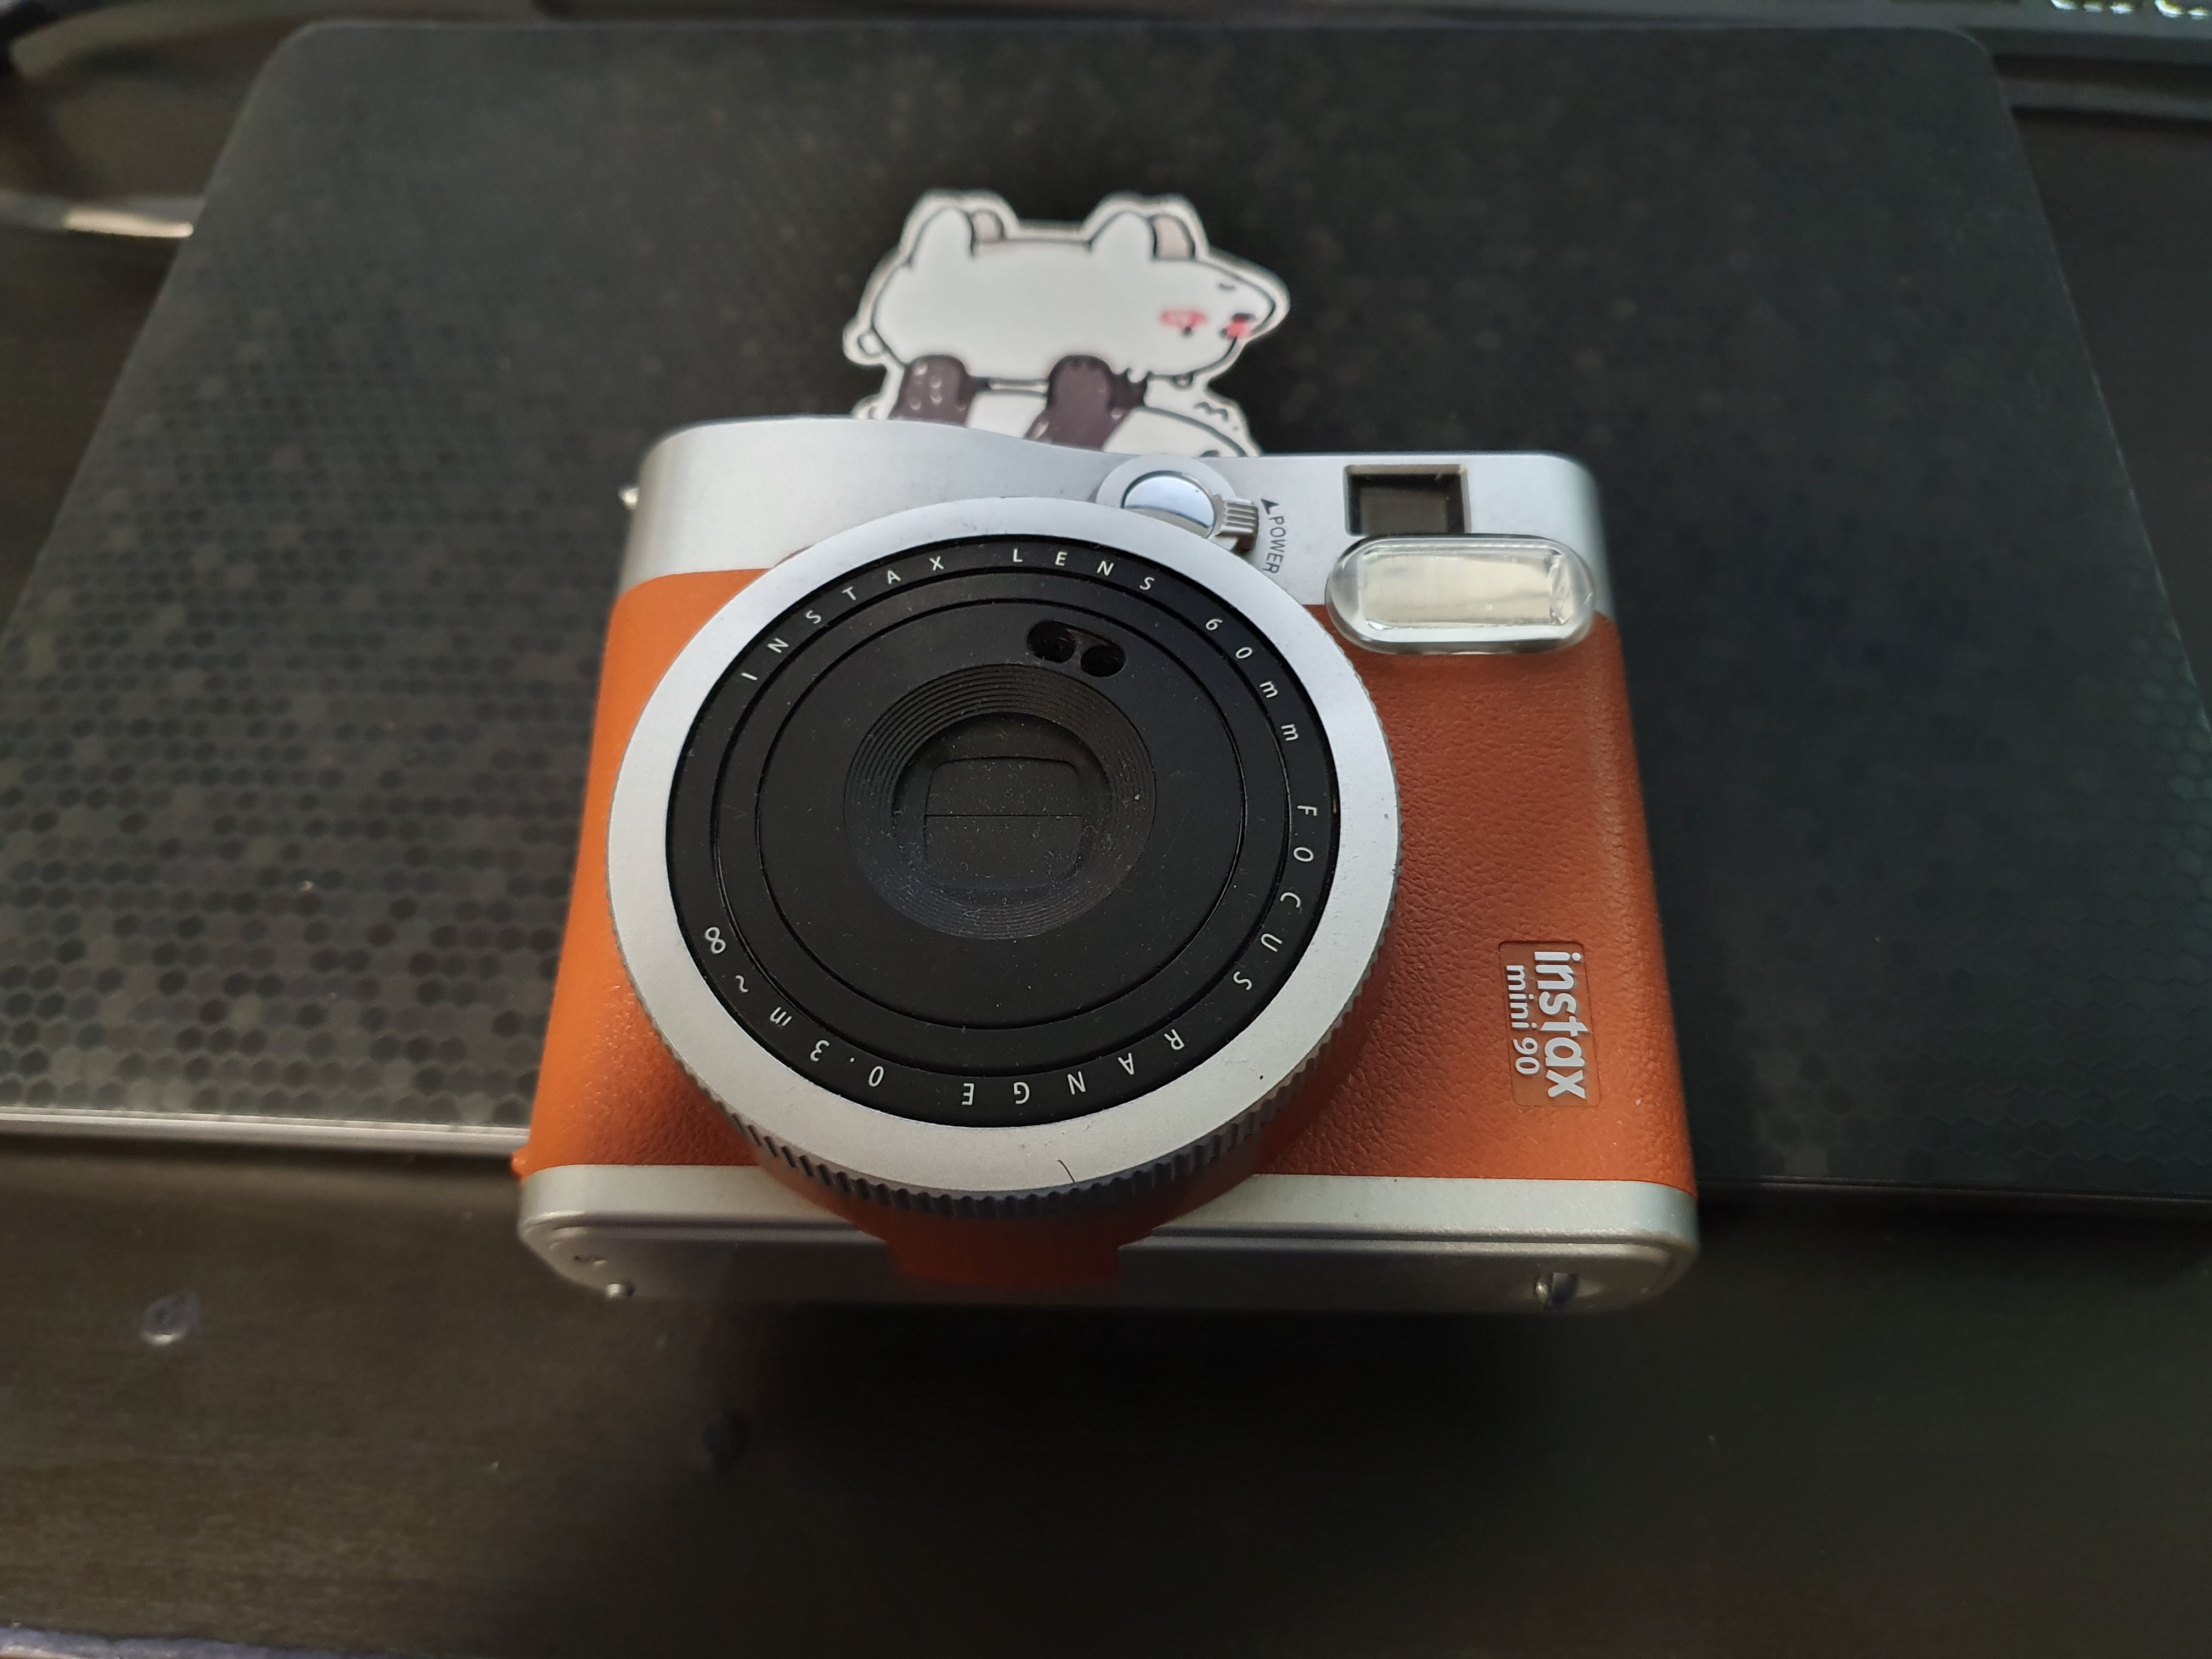
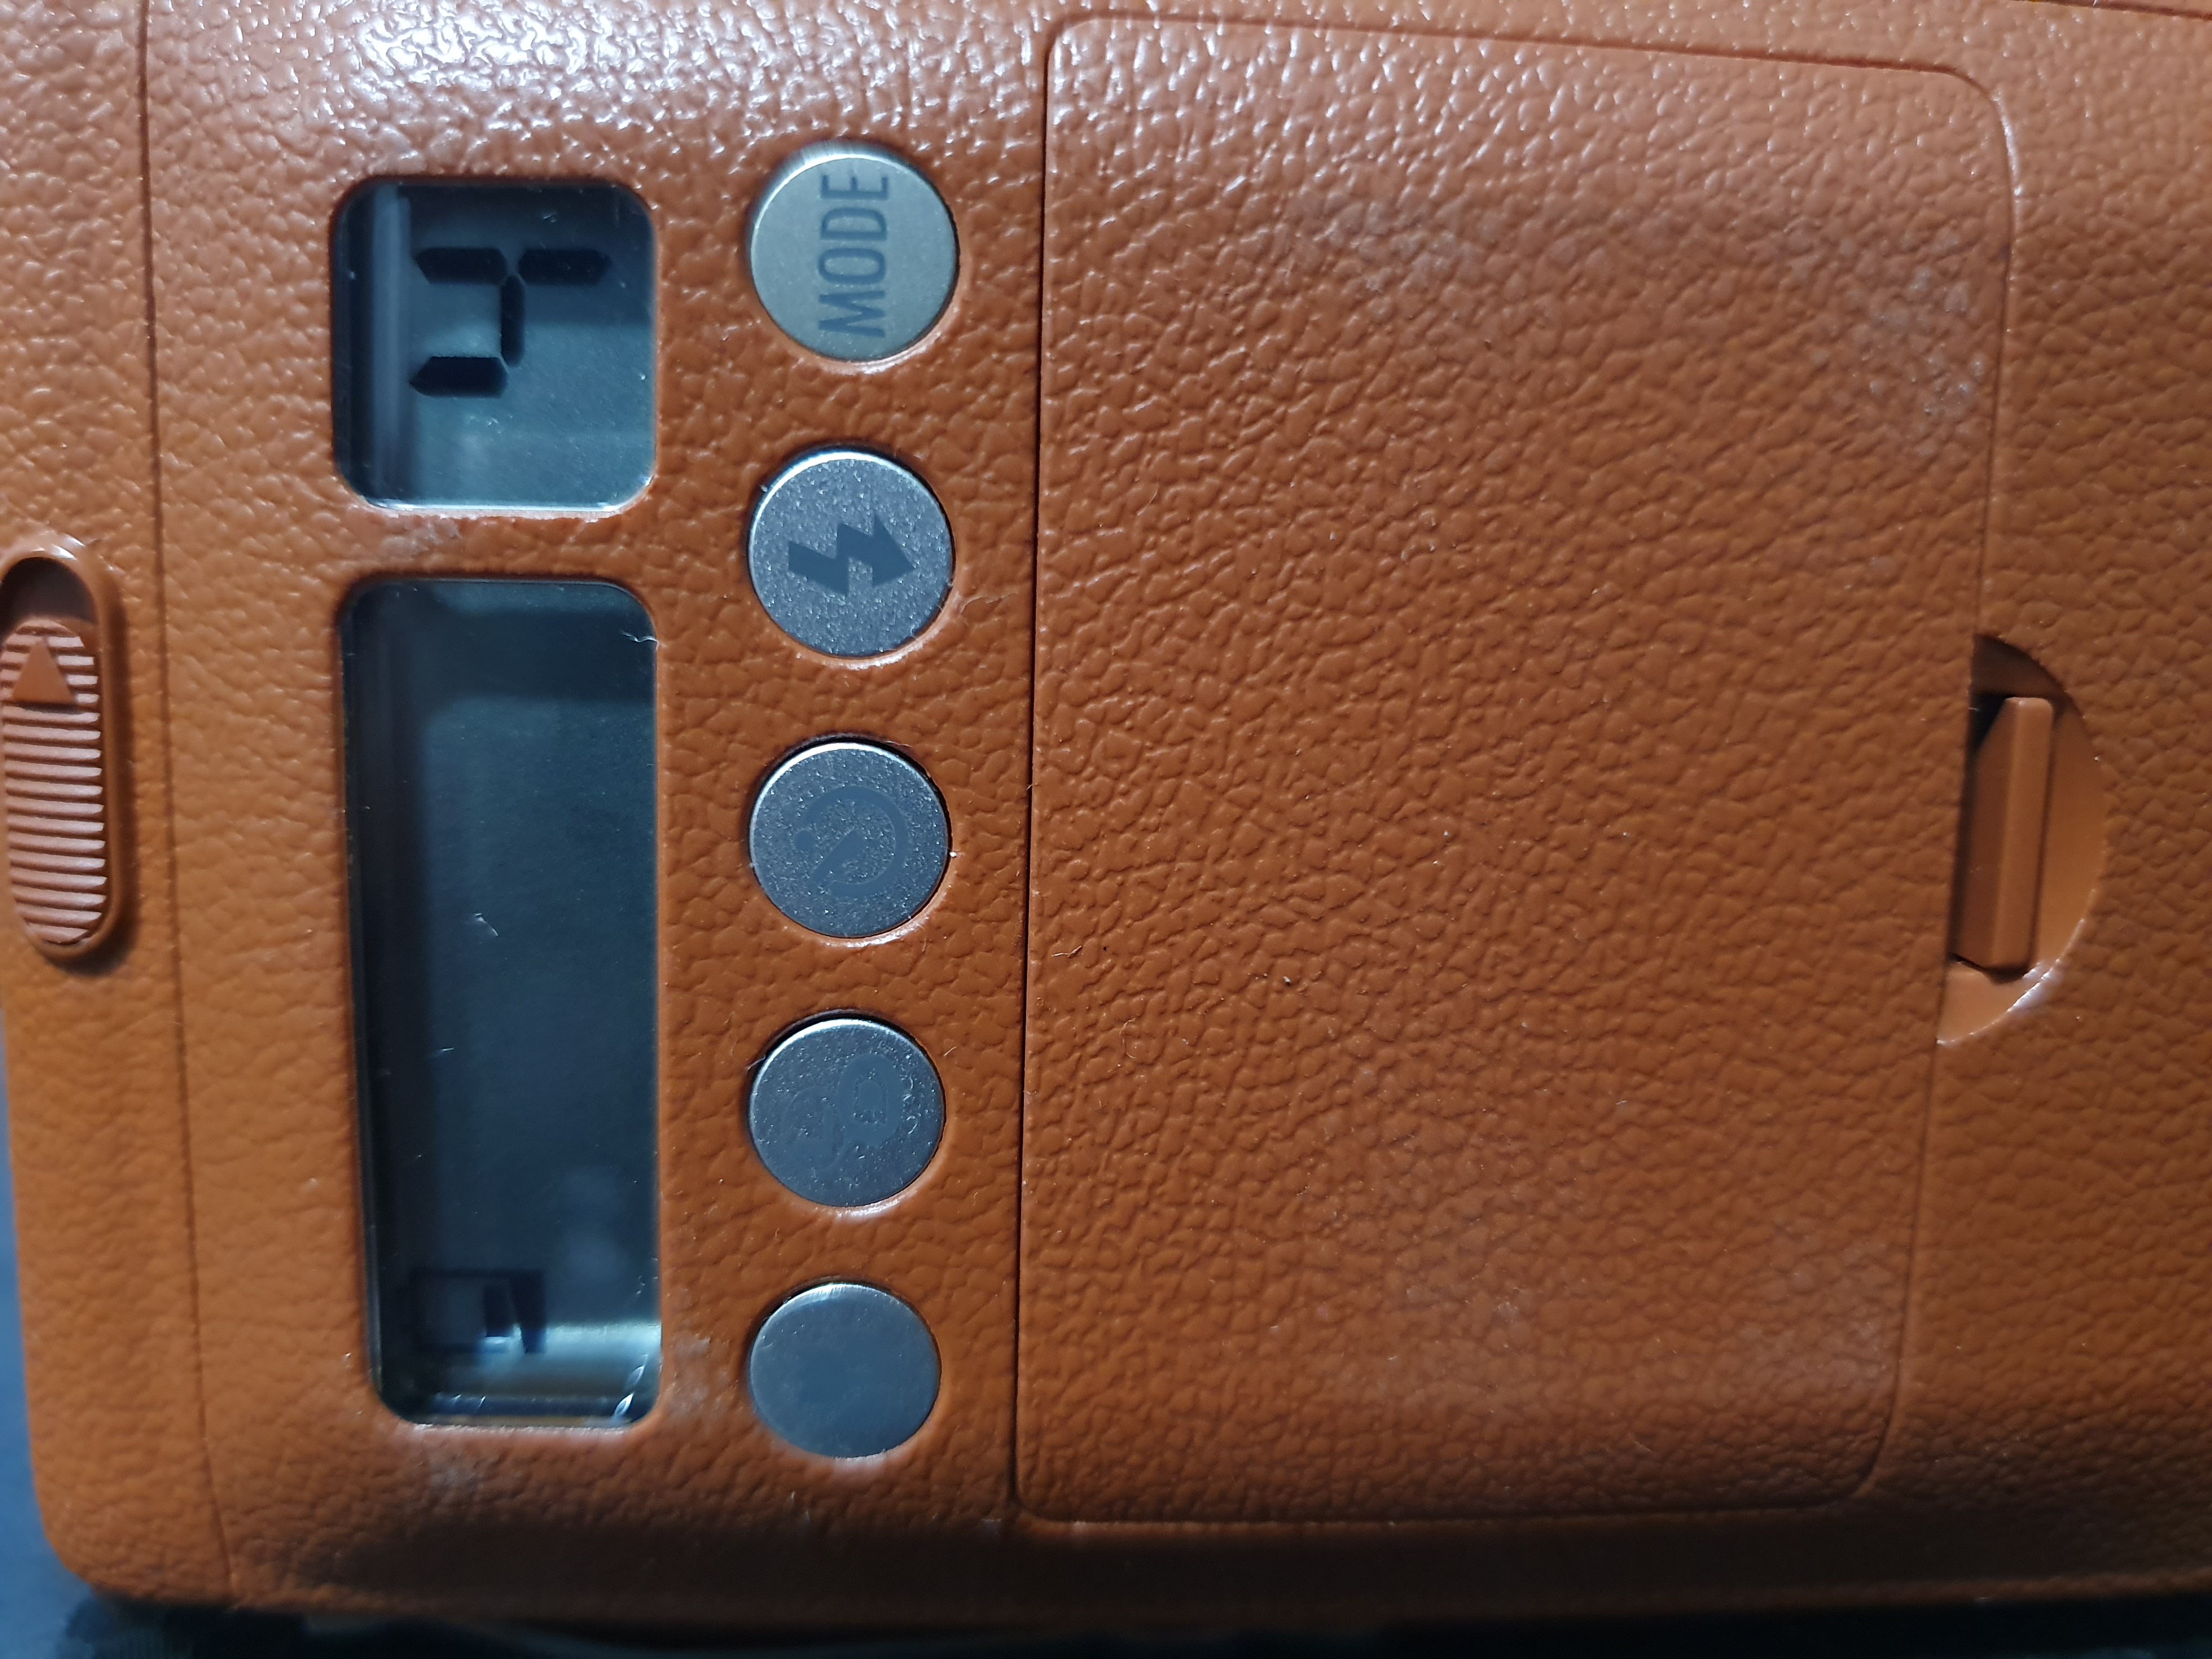
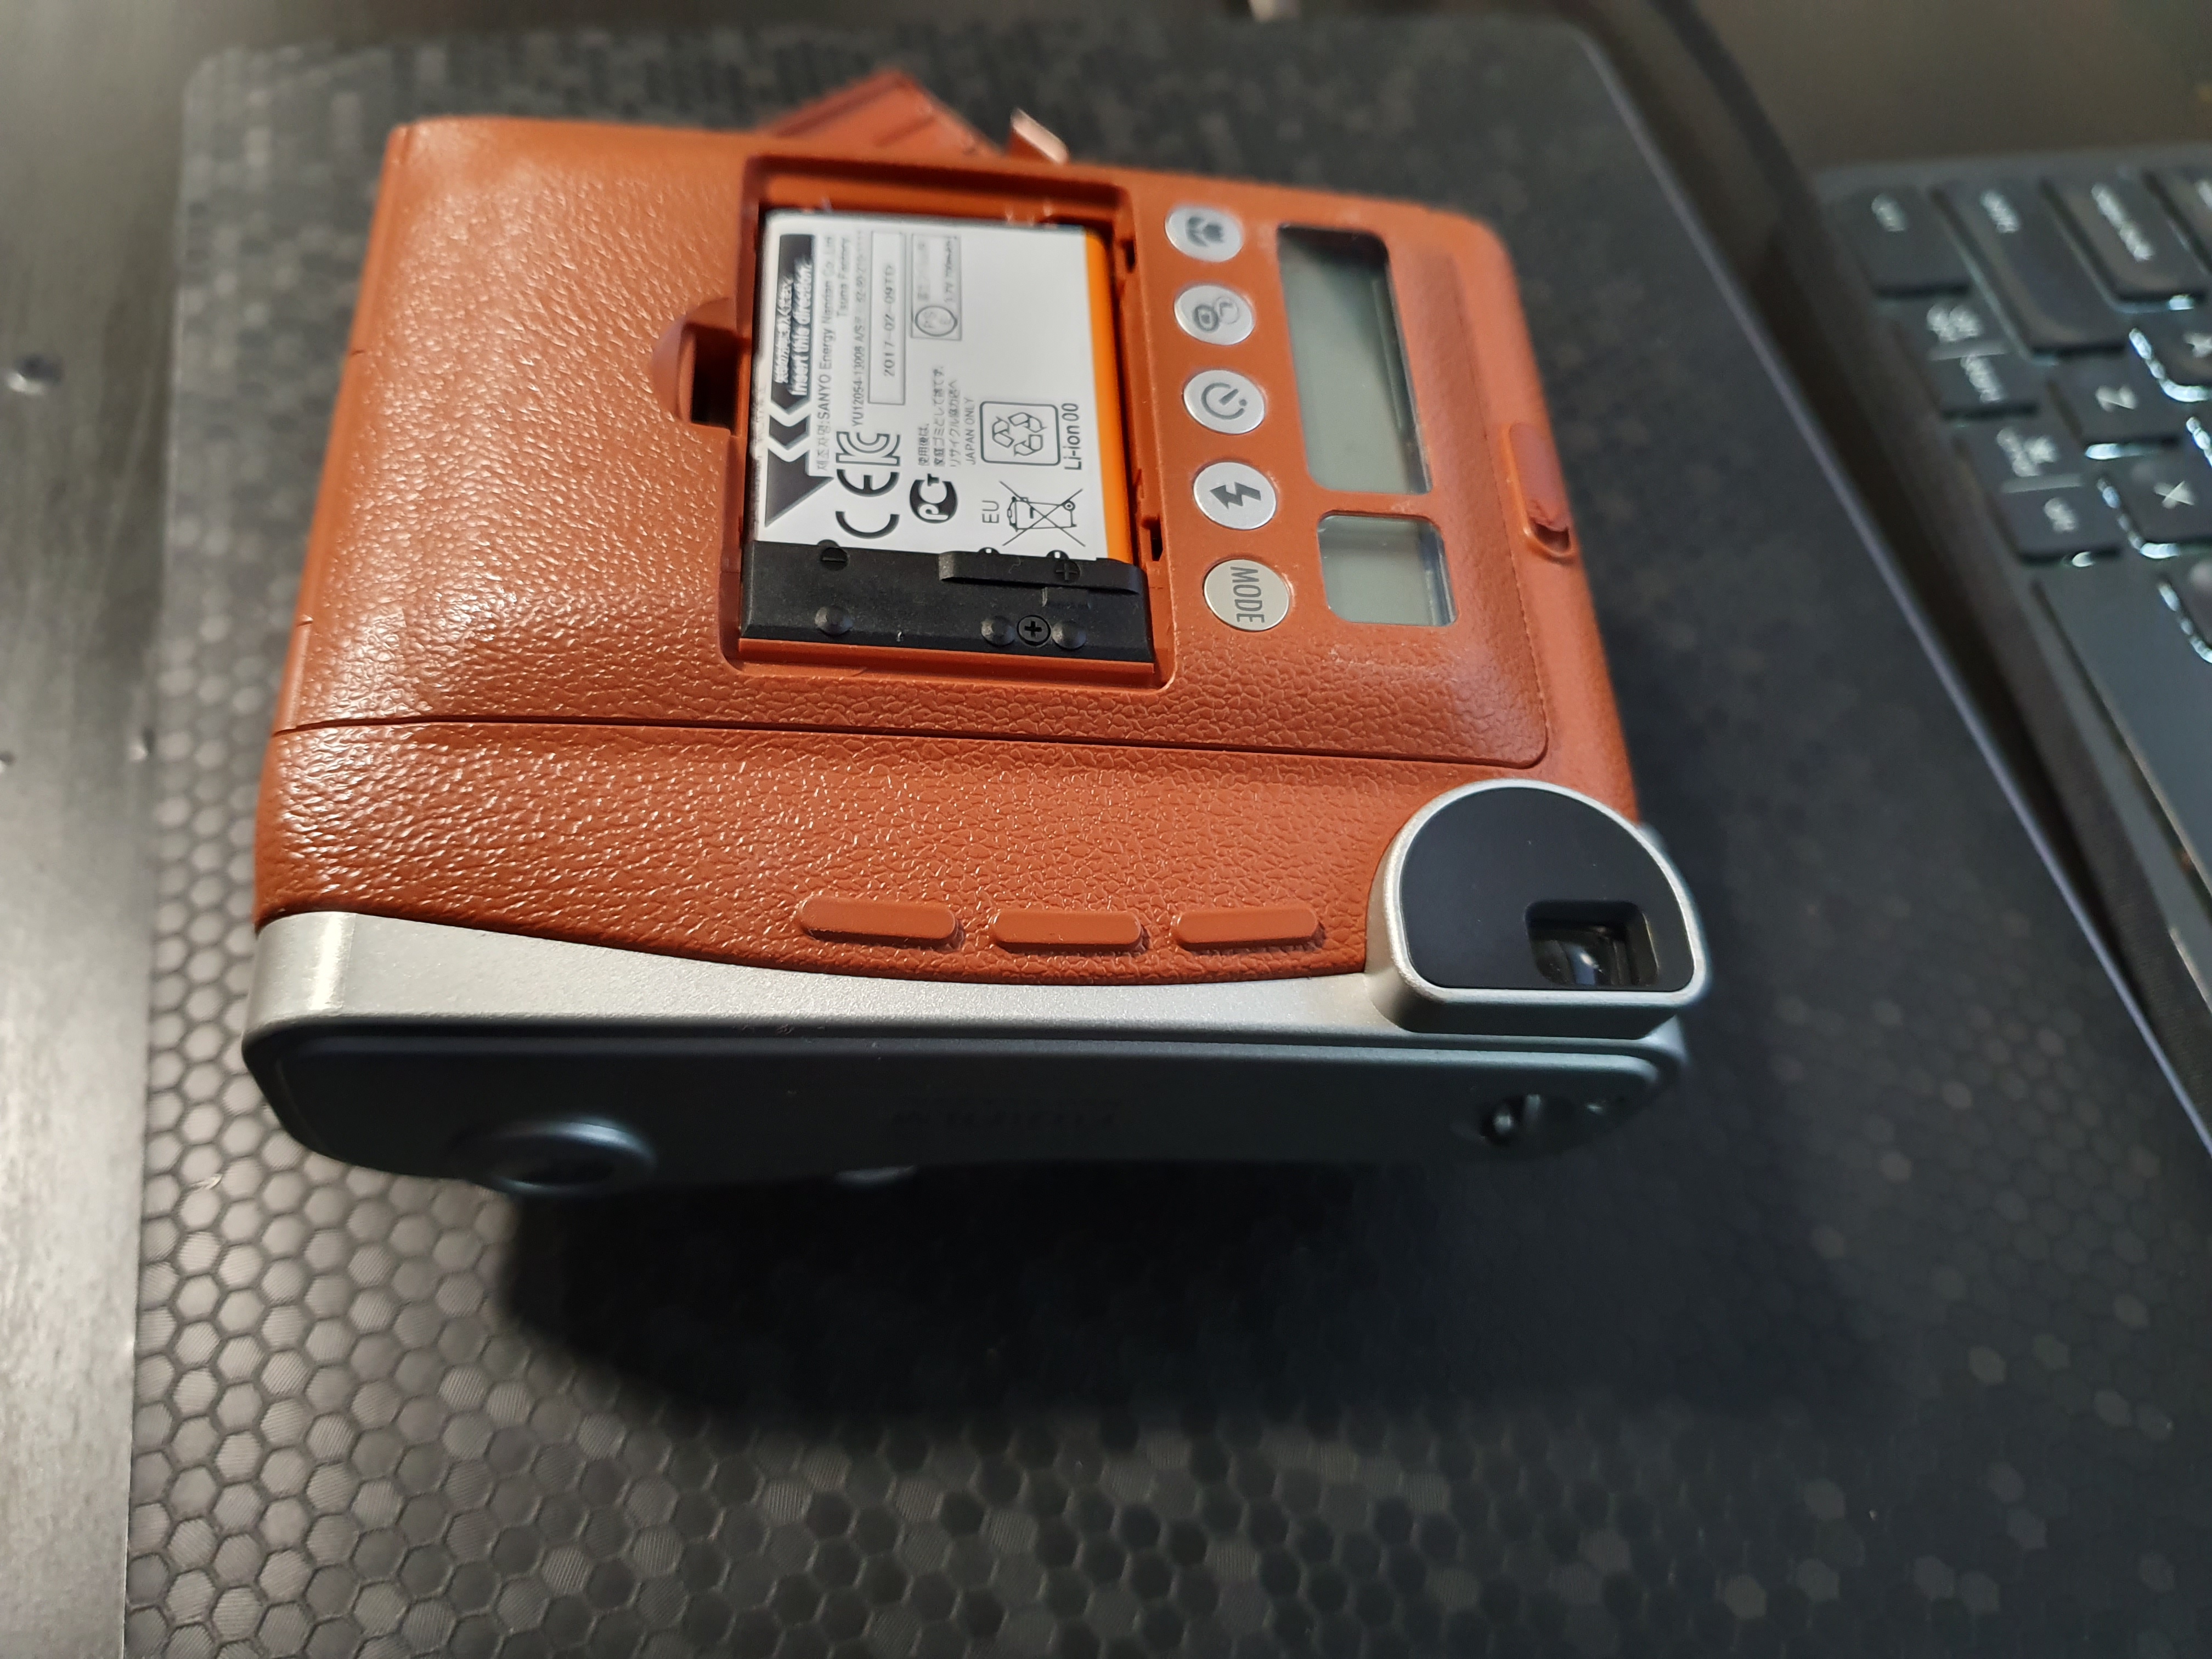
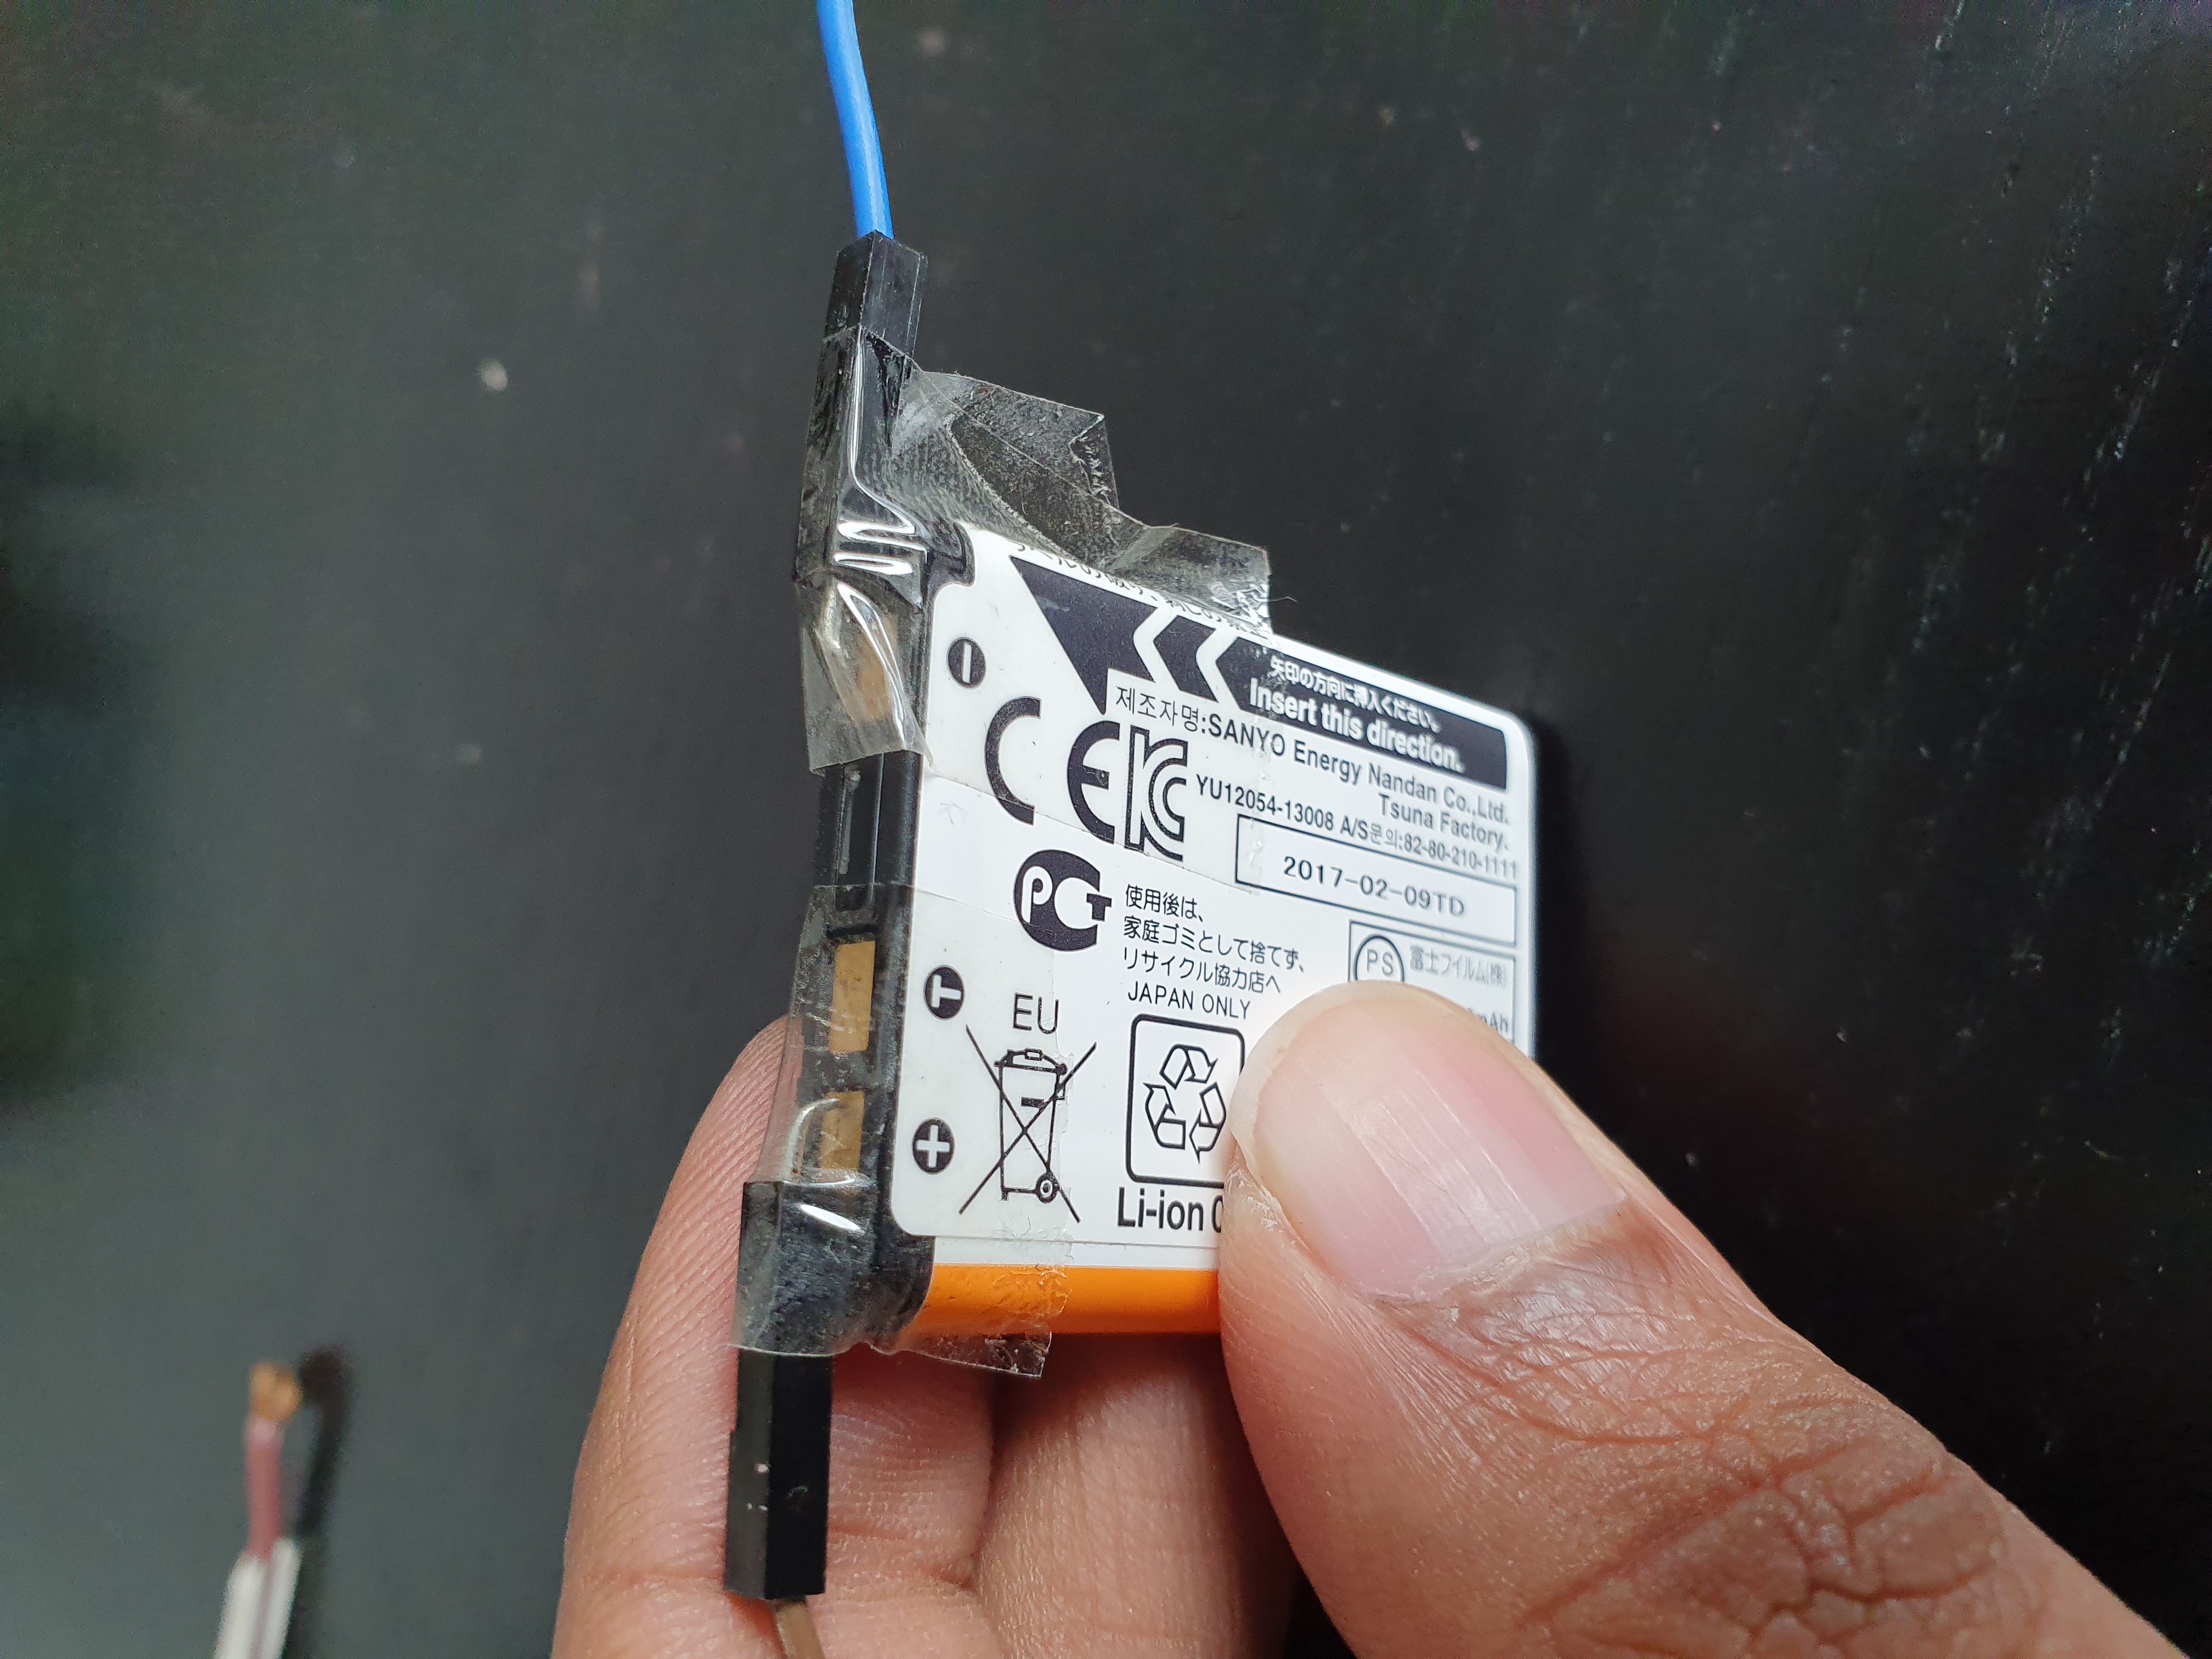
Everything looks good, except the battery's low. This doesn't seem like a problem until I realise that it's got an included rechargeable, and I don't have the charger anymore. Cue an hour of tearing apart old boxes.
Nothing. There are many chargers, but none of them belong to this one. It's also a finicky Li-Ion, which means I can't just stick a DC voltage on it.
§Or can I?
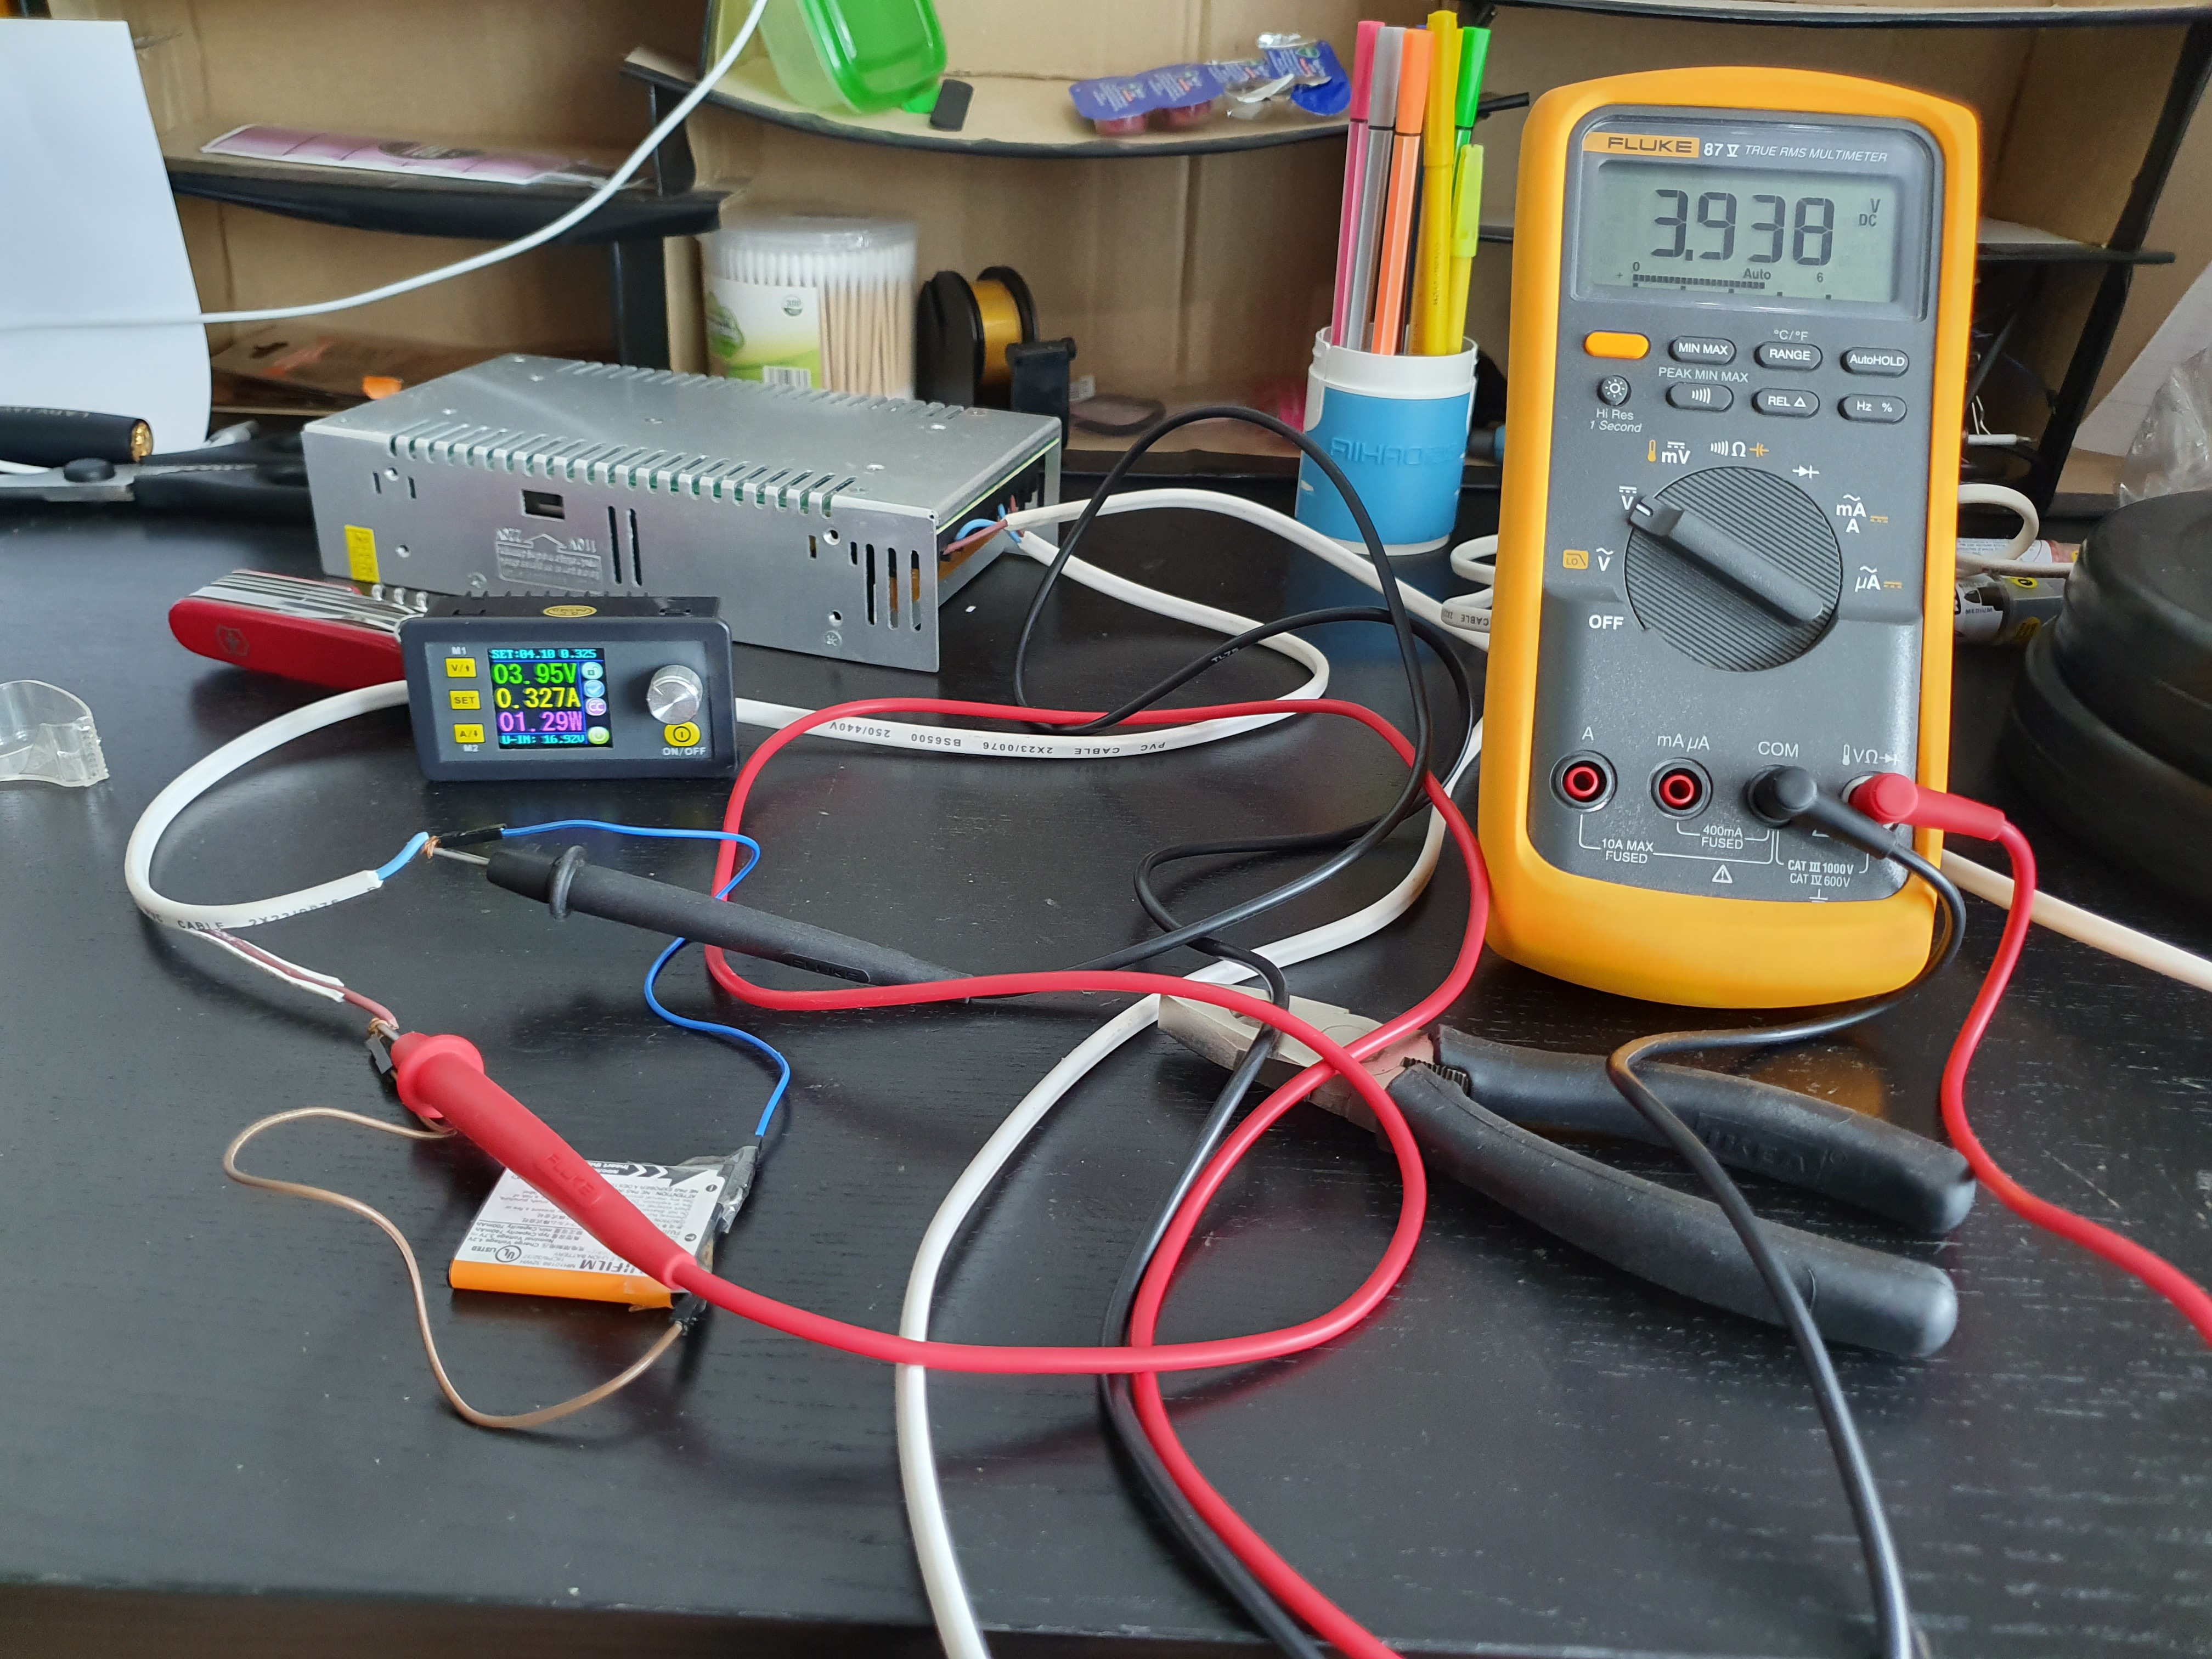
Let's give it a shot. I've never done this before, but I don't have too much to lose. It's also a tiny battery, so the amount of stored energy in there scares me less. First things first, let's check the battery:
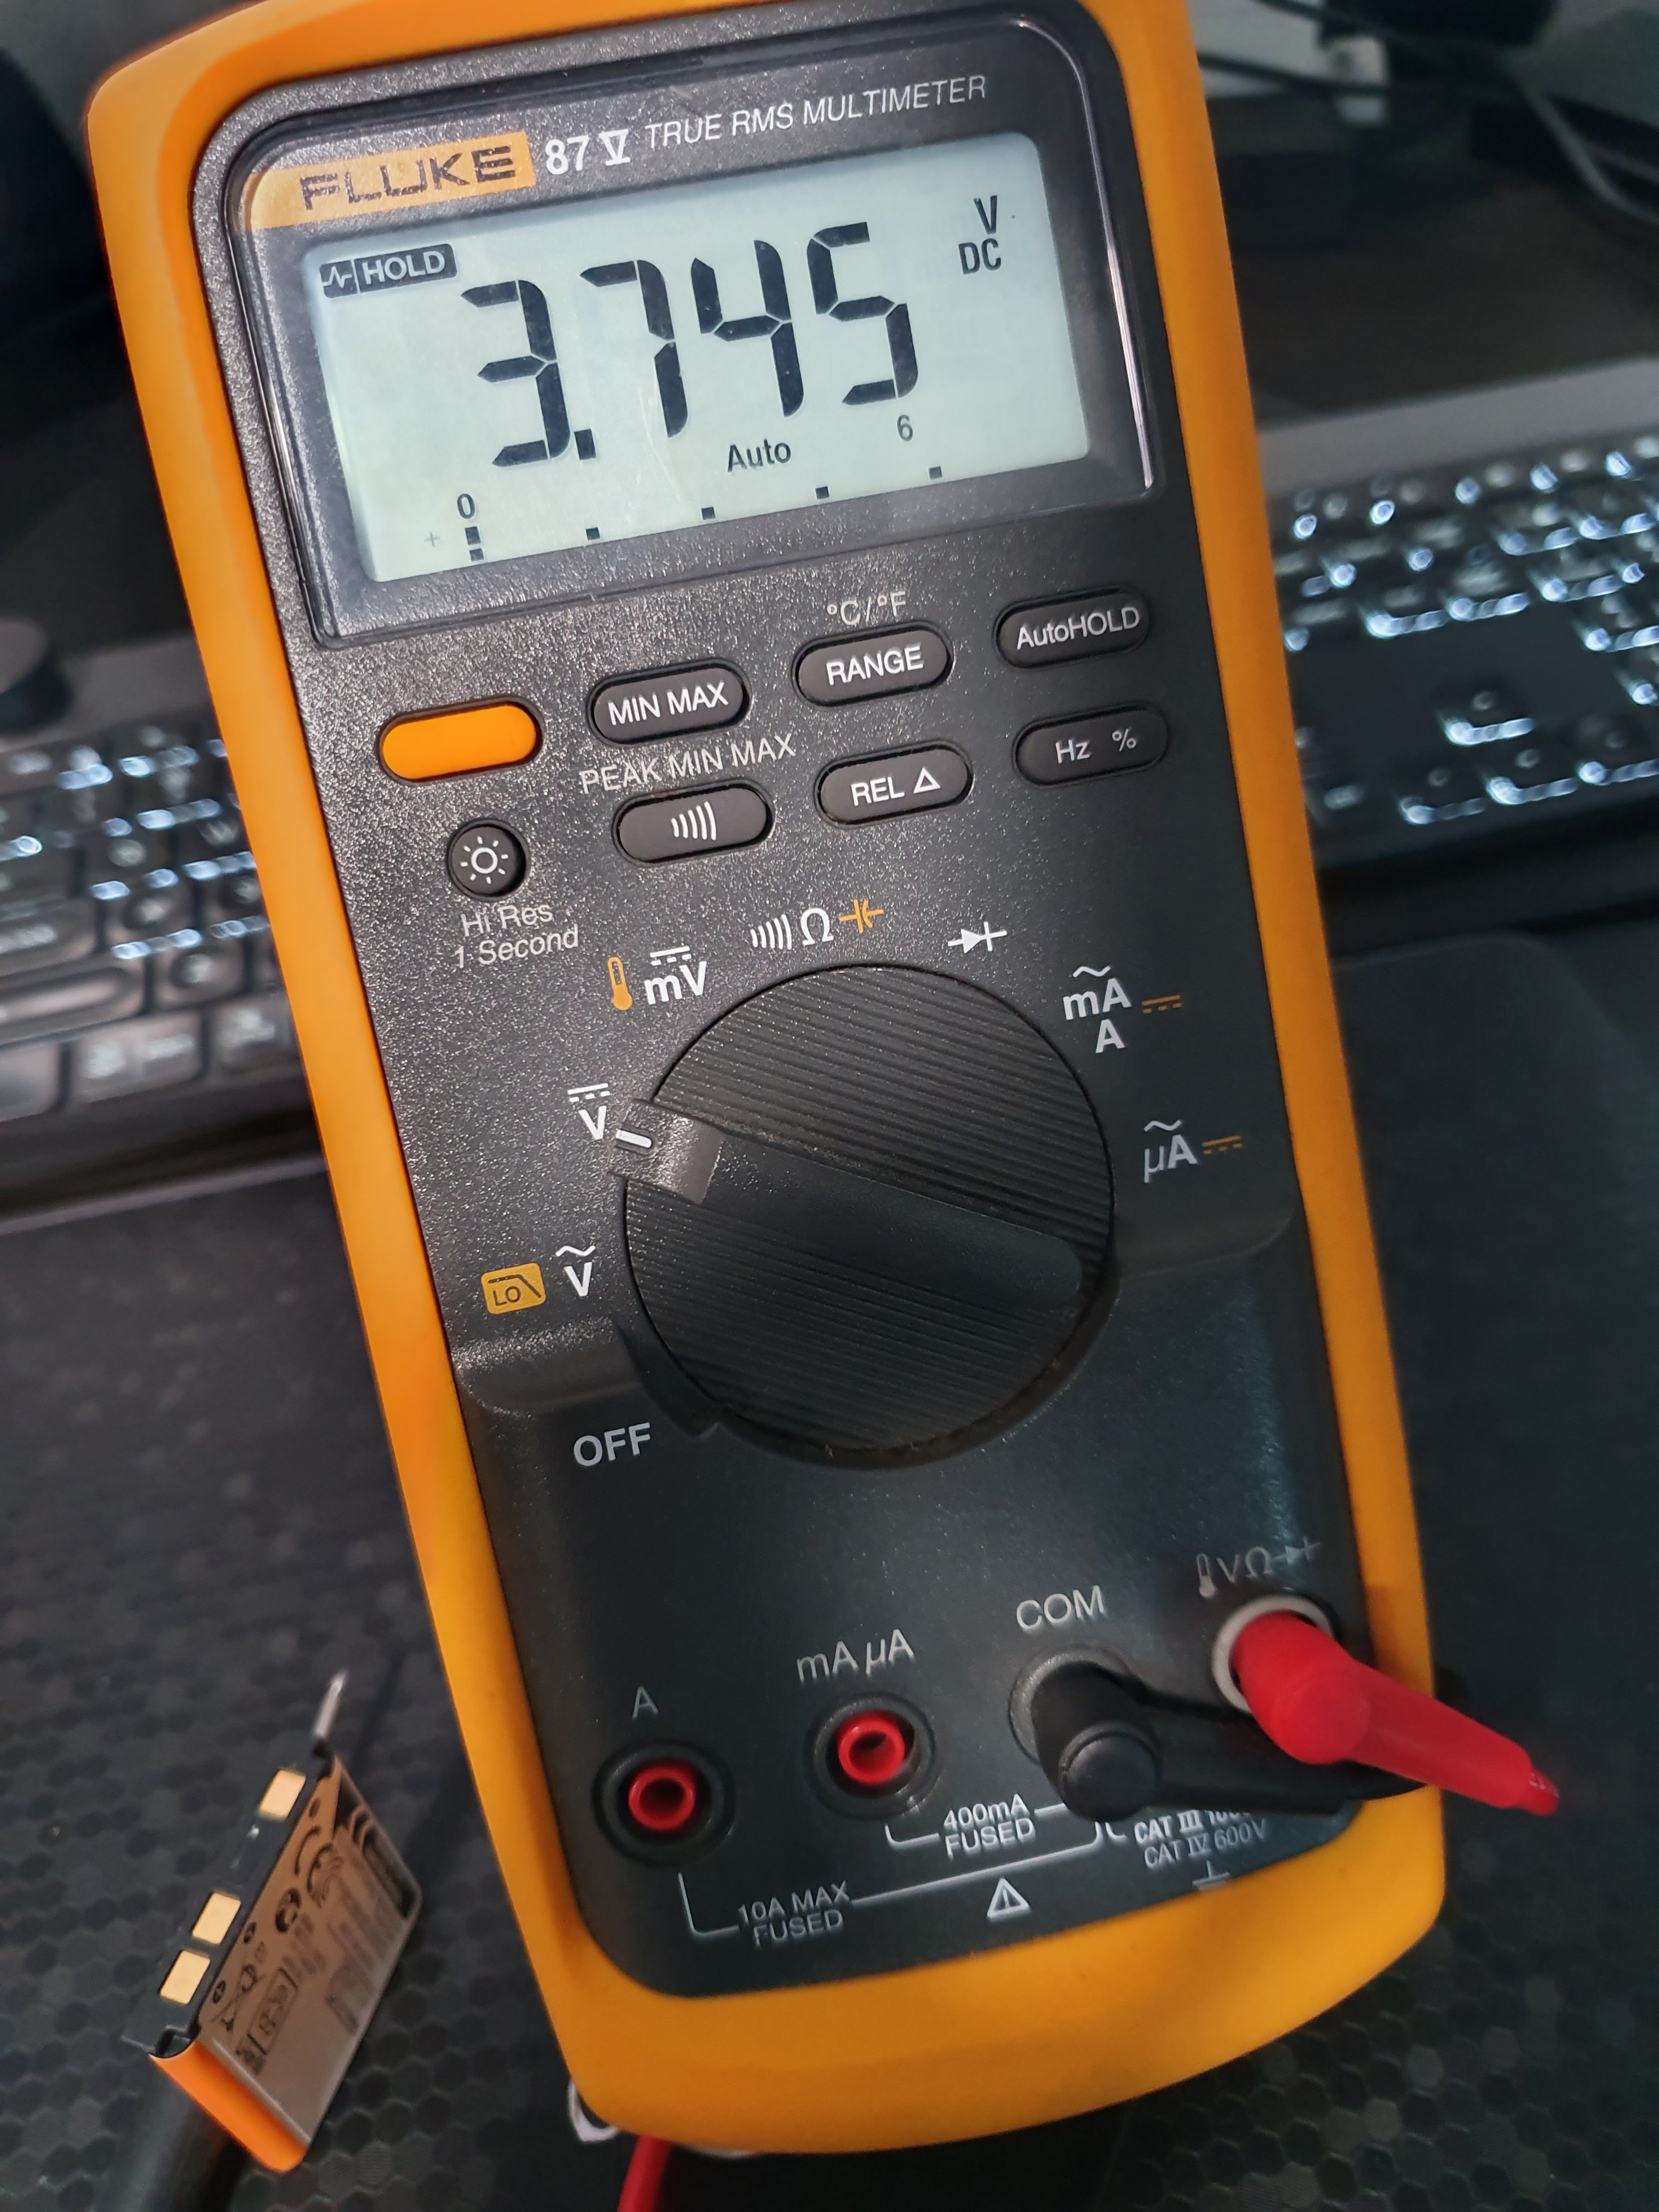
Looks like a single cell, rated voltage is 3.7V. Since the camera powers up, it's most definitely not deep dischaged, but let's make sure anyway:
Looks good, pretty healthy. Next order of business, we need to find out how to charge this thing. Thankfully, Dave from EEVBlog has a helpful video (when does he not)?
So the basic theory is to charge constant current until we reach the charging voltage, then constant voltage until the charging current drops off or you reach the recommended charging limit. Sounds good, but we should make sure what those numbers are for our particlar cell. A number of factors, like cathode chemistry, internal limiting circuits and thermal compensation all play into what the charging current and time should be.
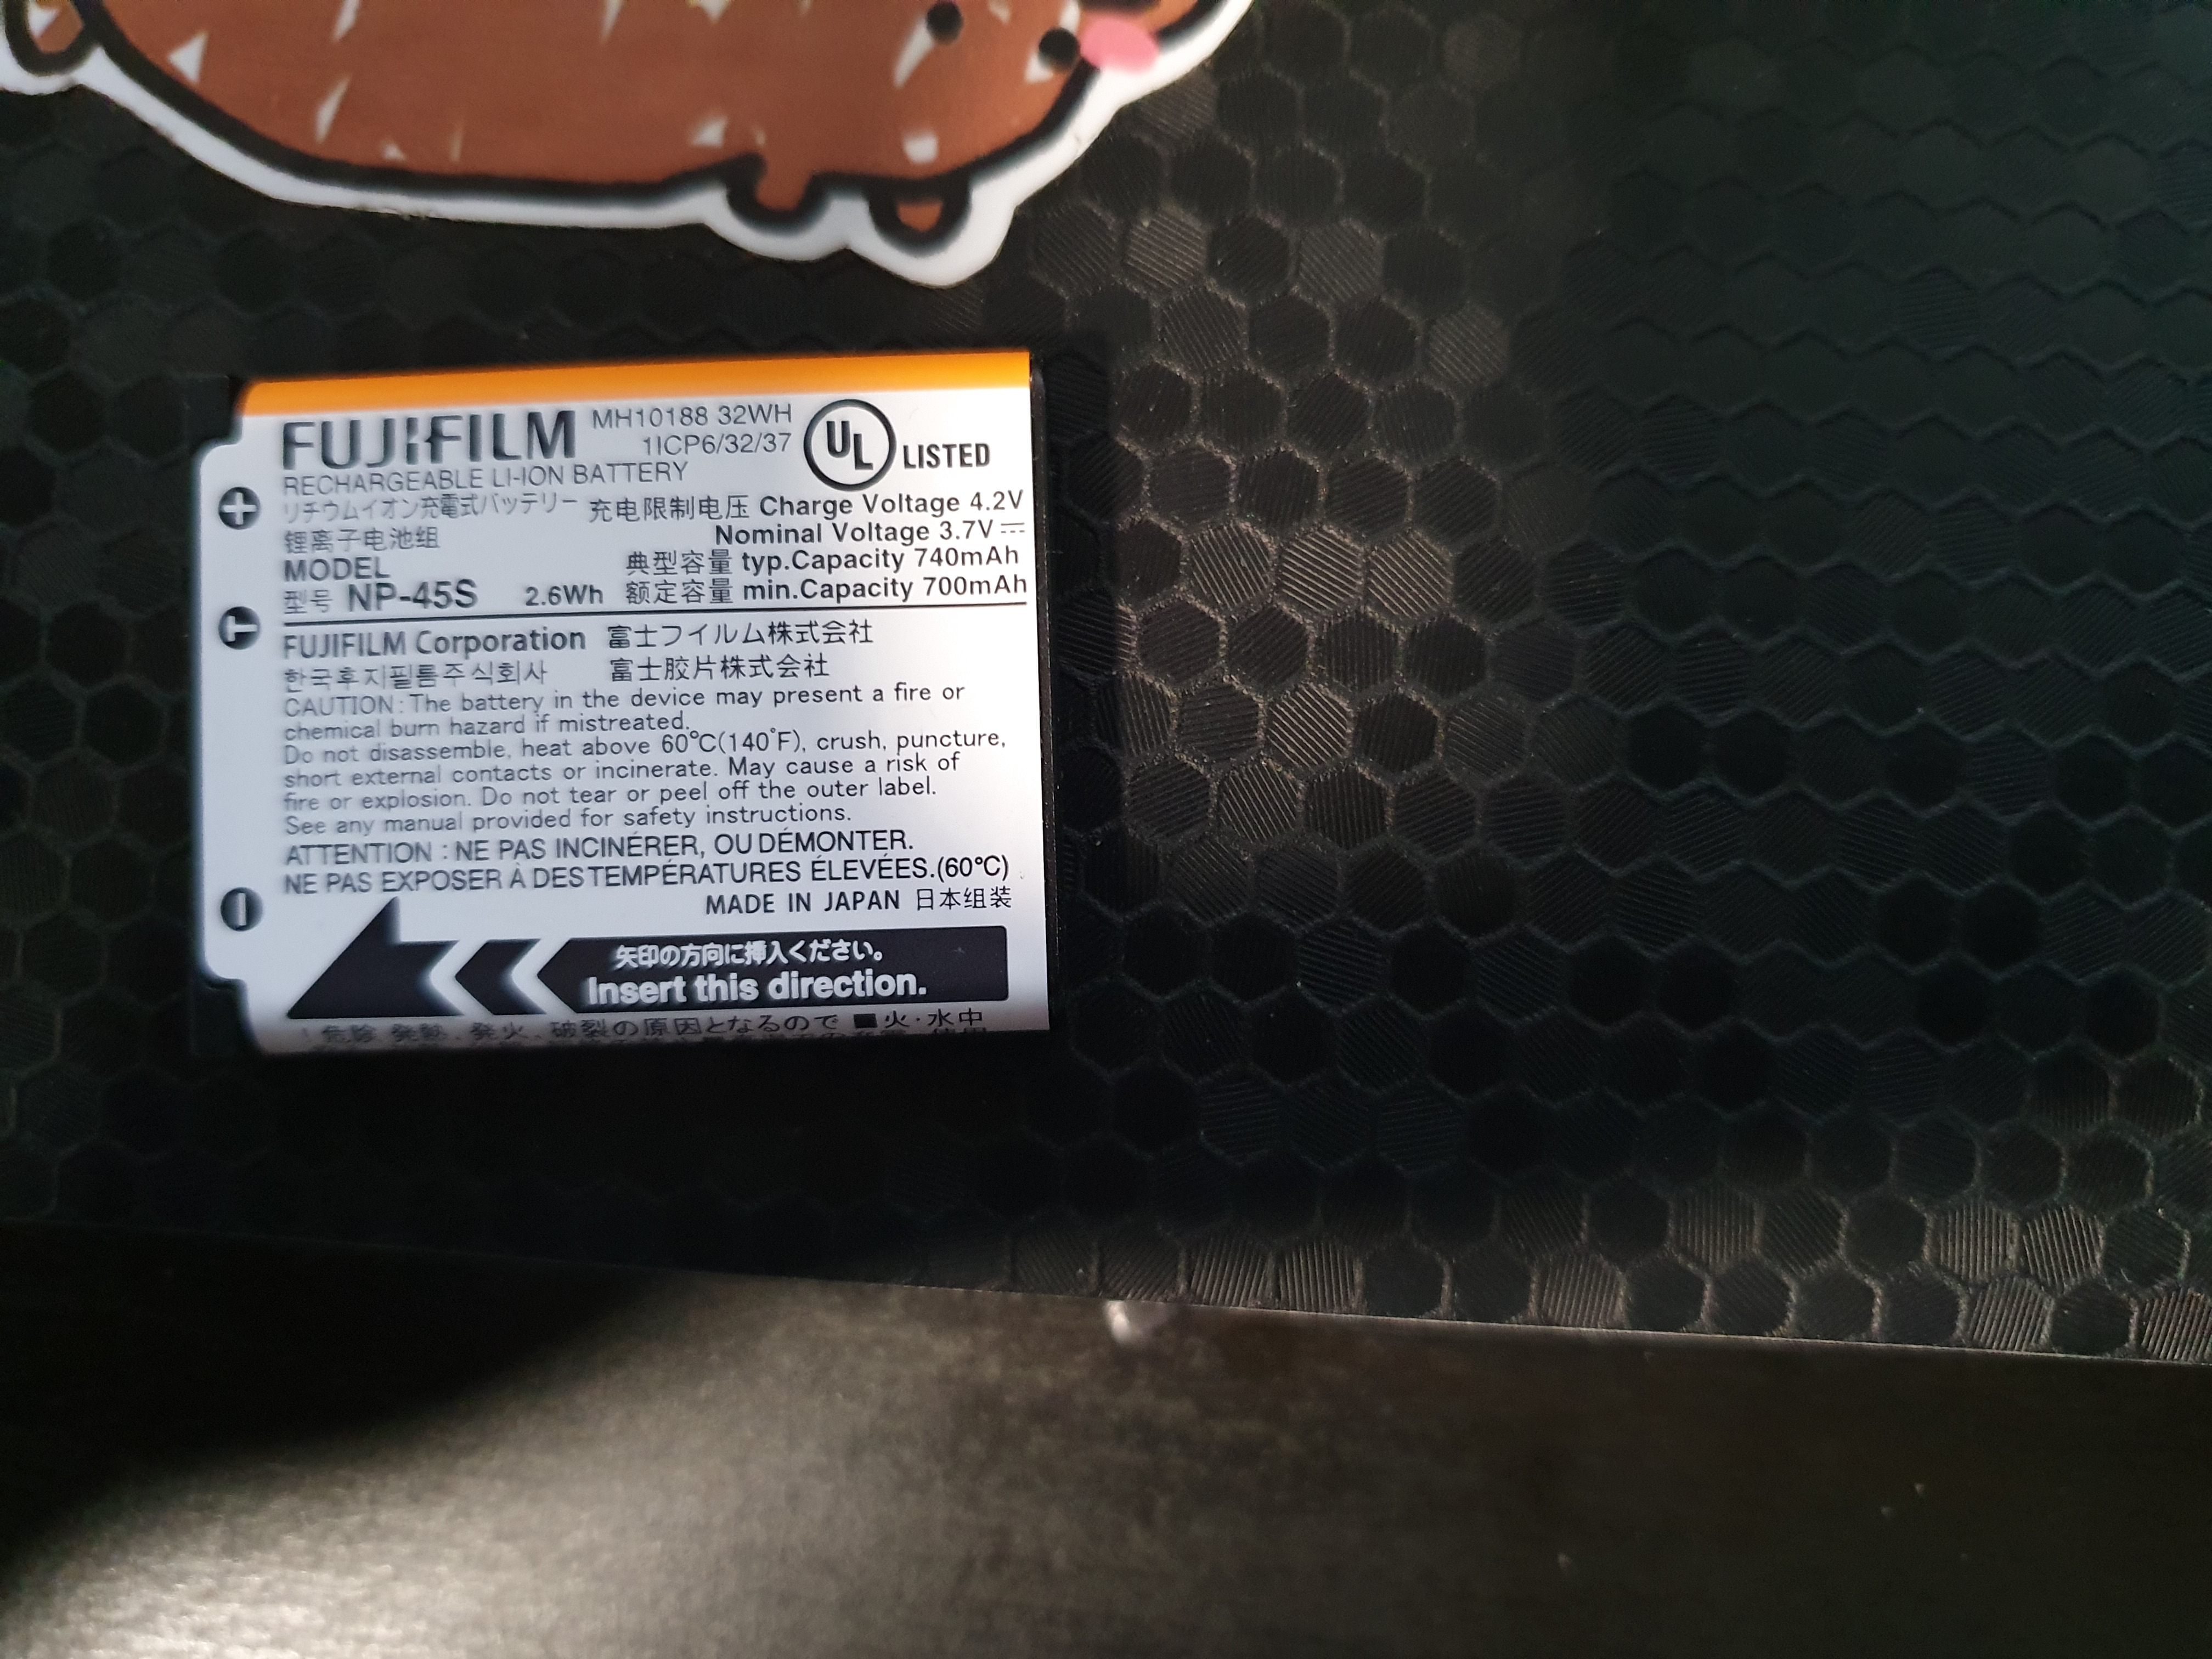
The model is an NP-45S, and sadly there aren't any real datasheets available for this particular one. There is one out there for NP-45 though, which should be close enough. It's not much of a datasheet - no charge or discharge curves here - but it's got the numbers we're looking for.
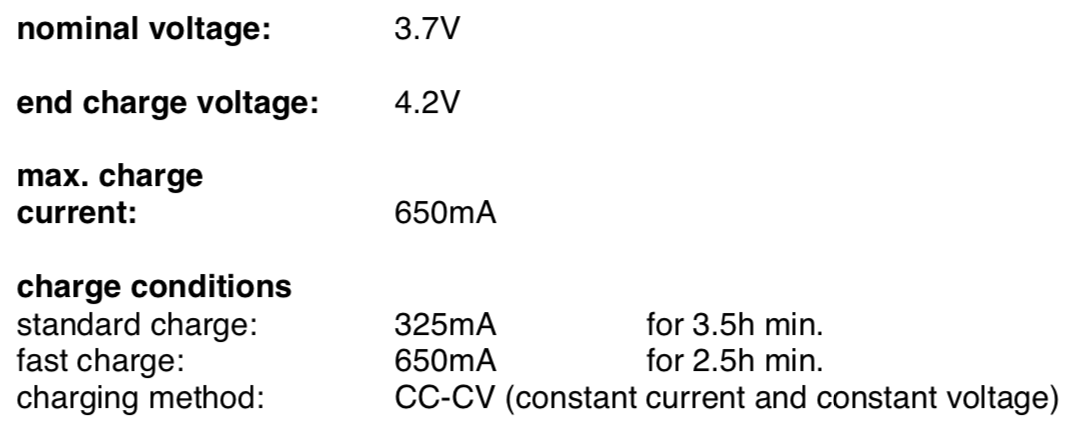
Let's stick with 325 mA until we know how it charges, then we can try upping it to fast charge if it looks right. Now, we need a constant current and constant voltage supply. The latter is pretty simple - I've had a small PC power supply from Aliexpress sitting on my desk that serves that purpose. Thank god for economies of scale - a low ripple, high wattage DC rail can be had for cheap in a PC power supply - even a second hand one'll do the job perfectly well. Anything barely good enough for a CPU is way overkill for me.
Constant current can be a bit more complicated, as is specifying a exact voltage. What we need is a DC-DC supply. Now, I could buy a >$200 bench power supply, or I can build my own, which is what I did some time ago once I found this.
Isn't that the cutest little module you ever saw? When I got it, it was S$20 including shipping, and it's rated for up to 160 W, so if it does 50% of that I'm good for my needs. Comes with a beautiful display, simultaneous constant current AND constant voltage settings, as well as overvoltage and overcurrent protection. A number of other features, but this is already amazing for the price. If you're looking for more info, Dave's covered this one in detail, including characterization.
It does DC-DC, so all it needs is a clean DC output which the PSU can happily provide. Hook the two together, and you've got a good bench power supply for most any need.
I've been meaning to try this out for some time, so I'm happy to have the opportunity. First problem - I was lazy. I didn't build an enclosure or hook up a good set of power leads to the PSU. We'll have to fix that later, but right now I have no choice - my flight's in three hours. Thankfully it should be enough to handle the currents involved, and I managed to pull out a cable from one of my fans (thing that blows air). It's a snug fit, let's add some tape to be sure.
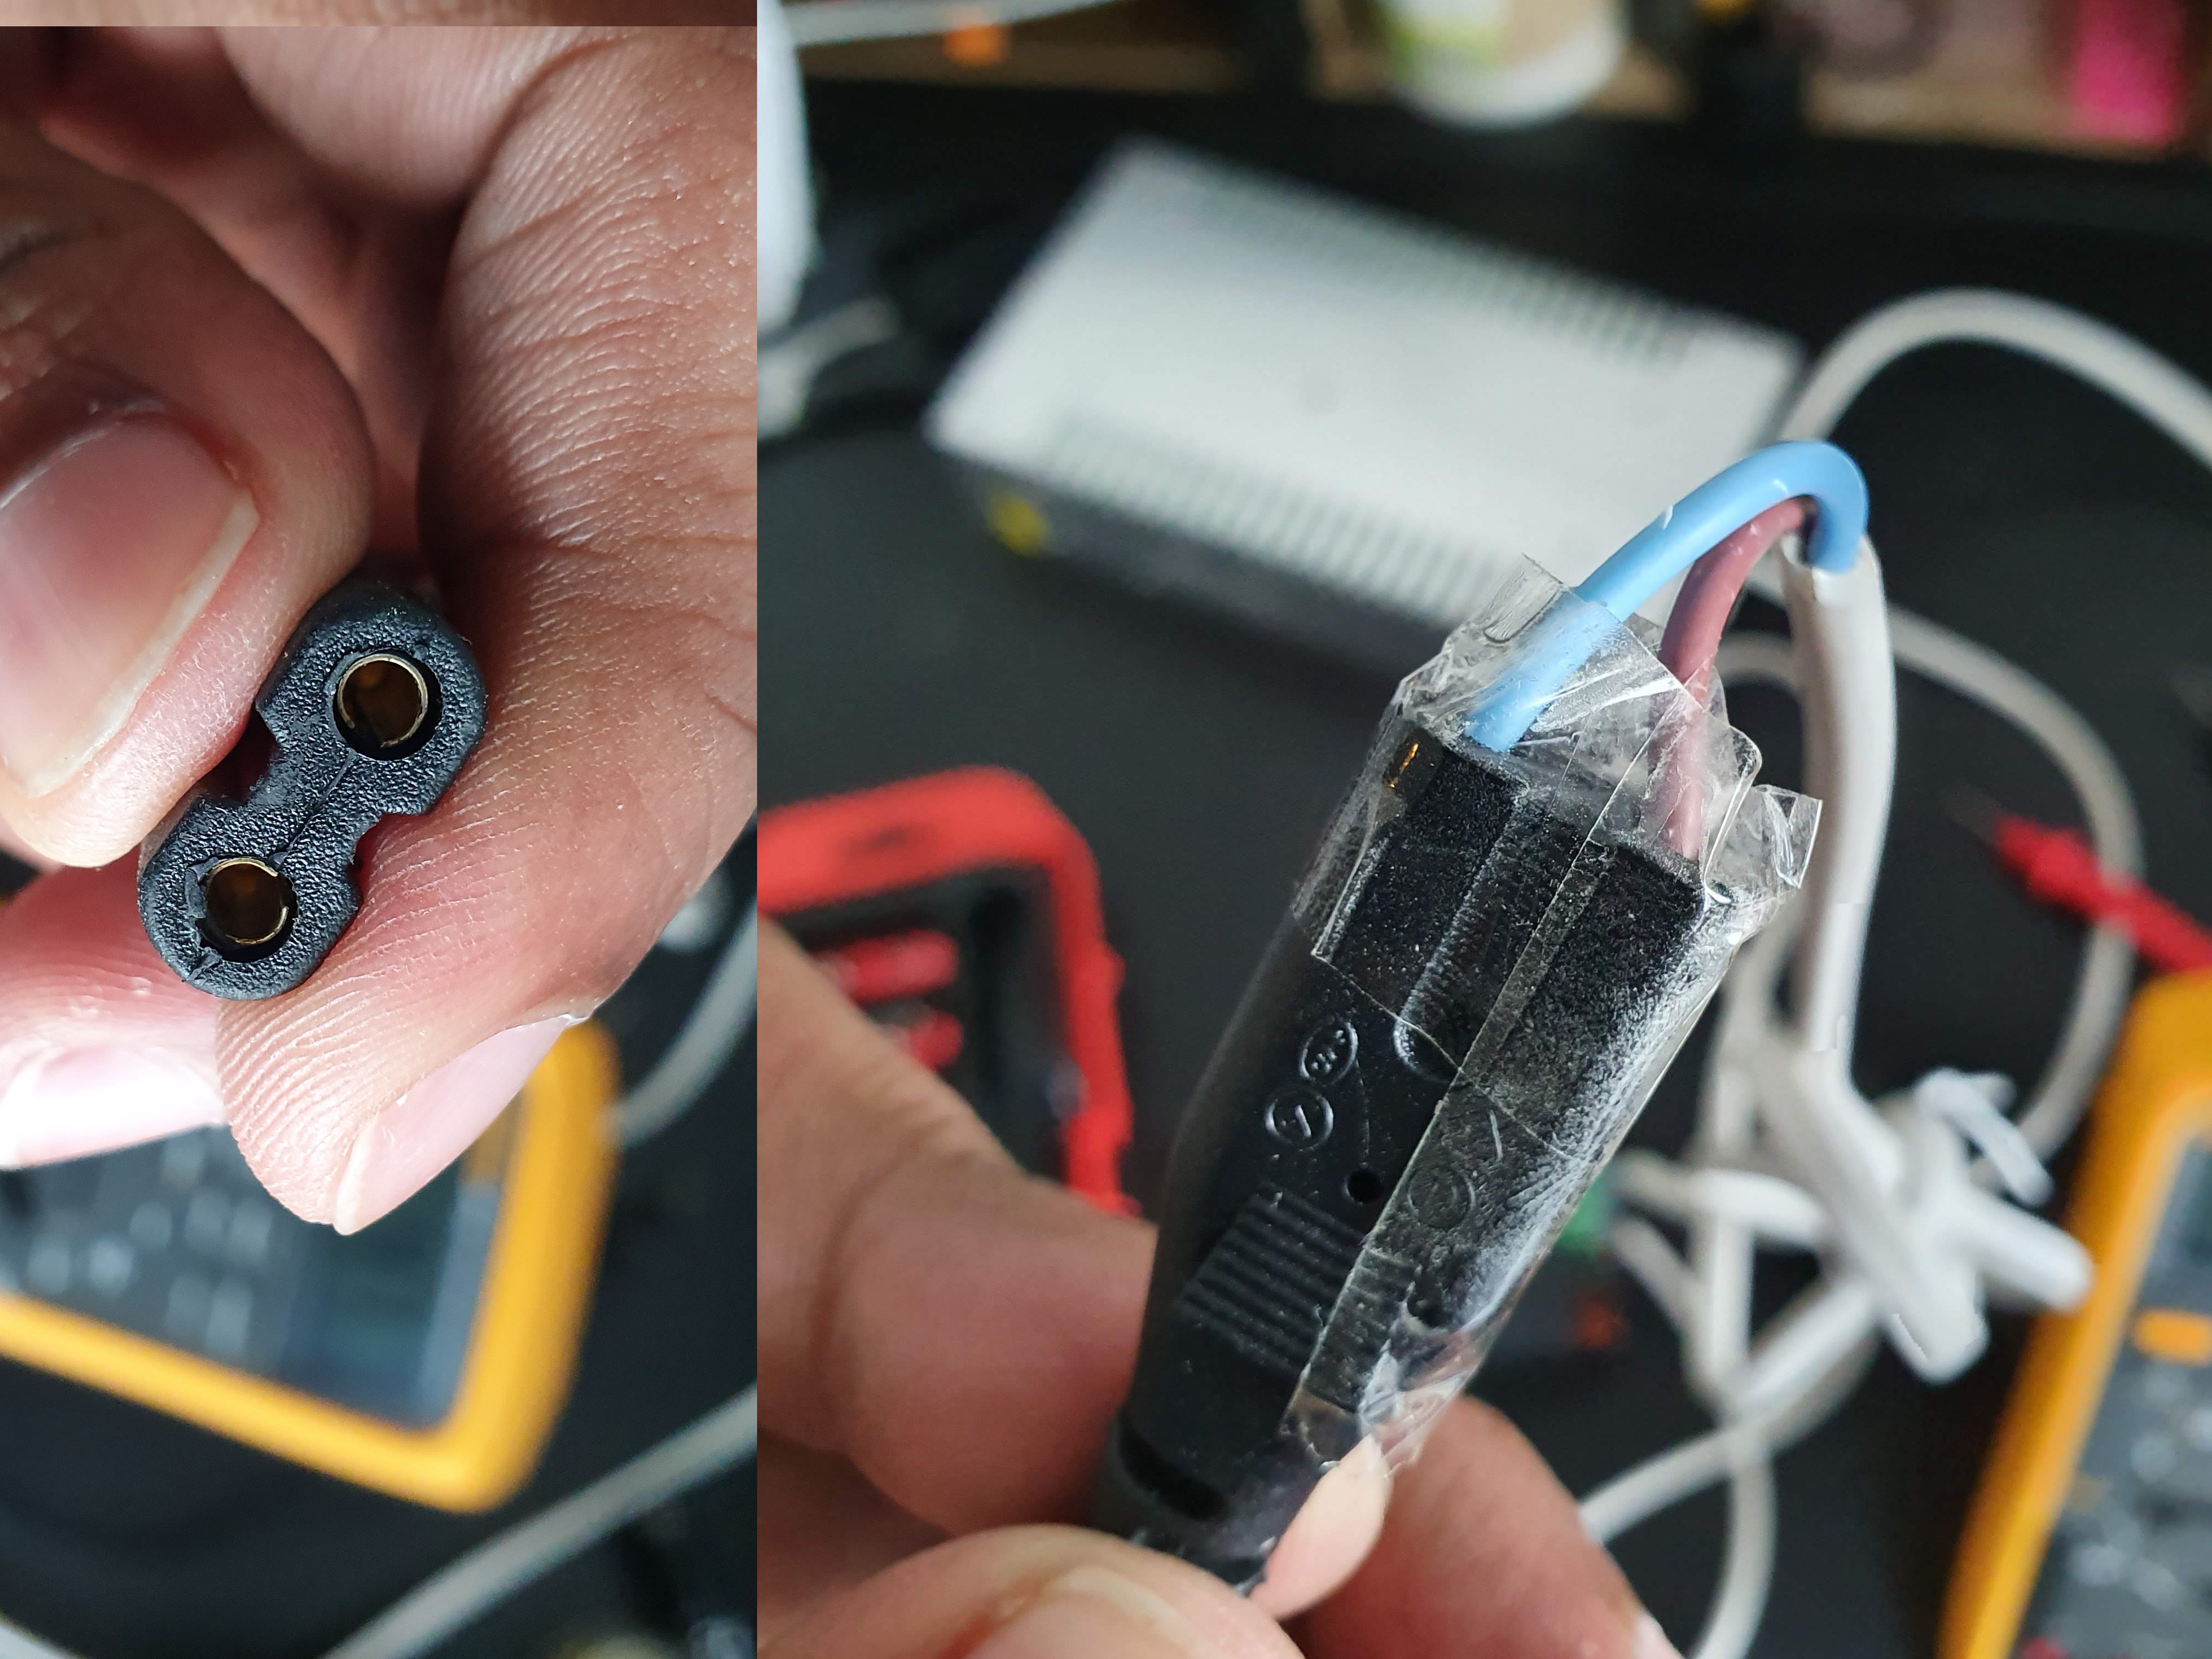
Once that's done, we need to find a way to reliably connect to the battery terminals. This used to take me all manner of heartache, but I've since perfected the crimped-burg-wire-with-tape techique:
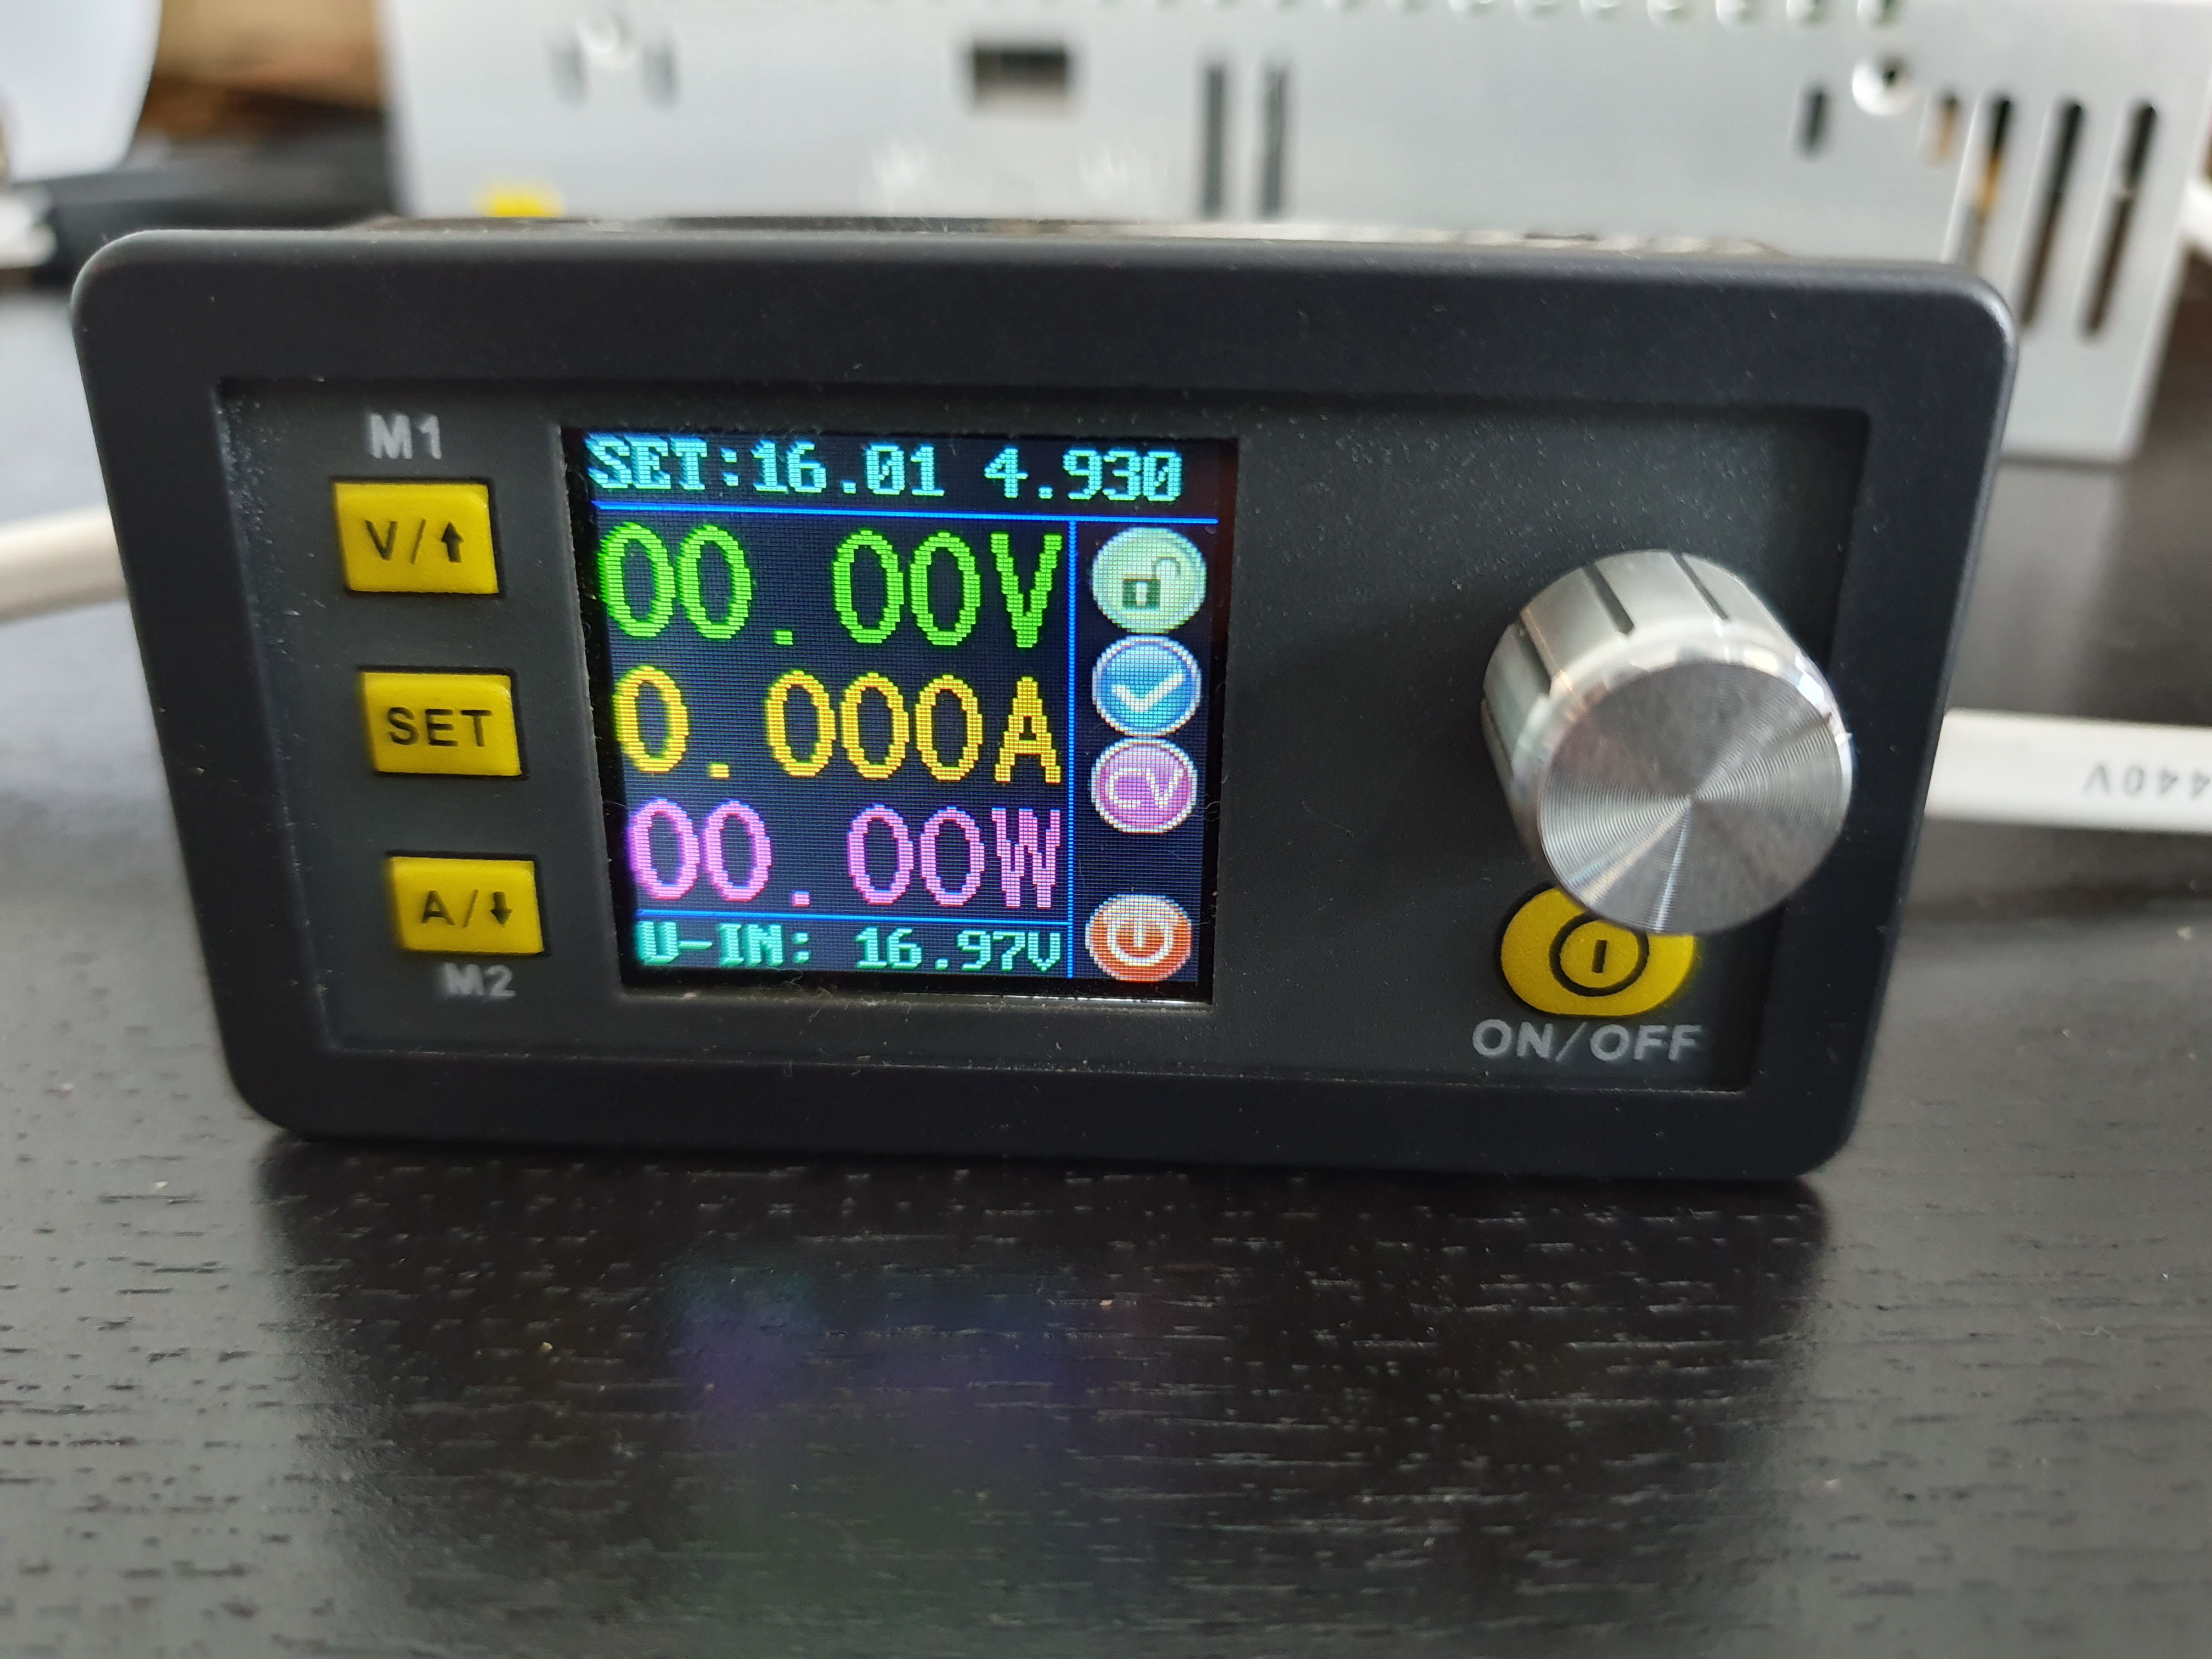
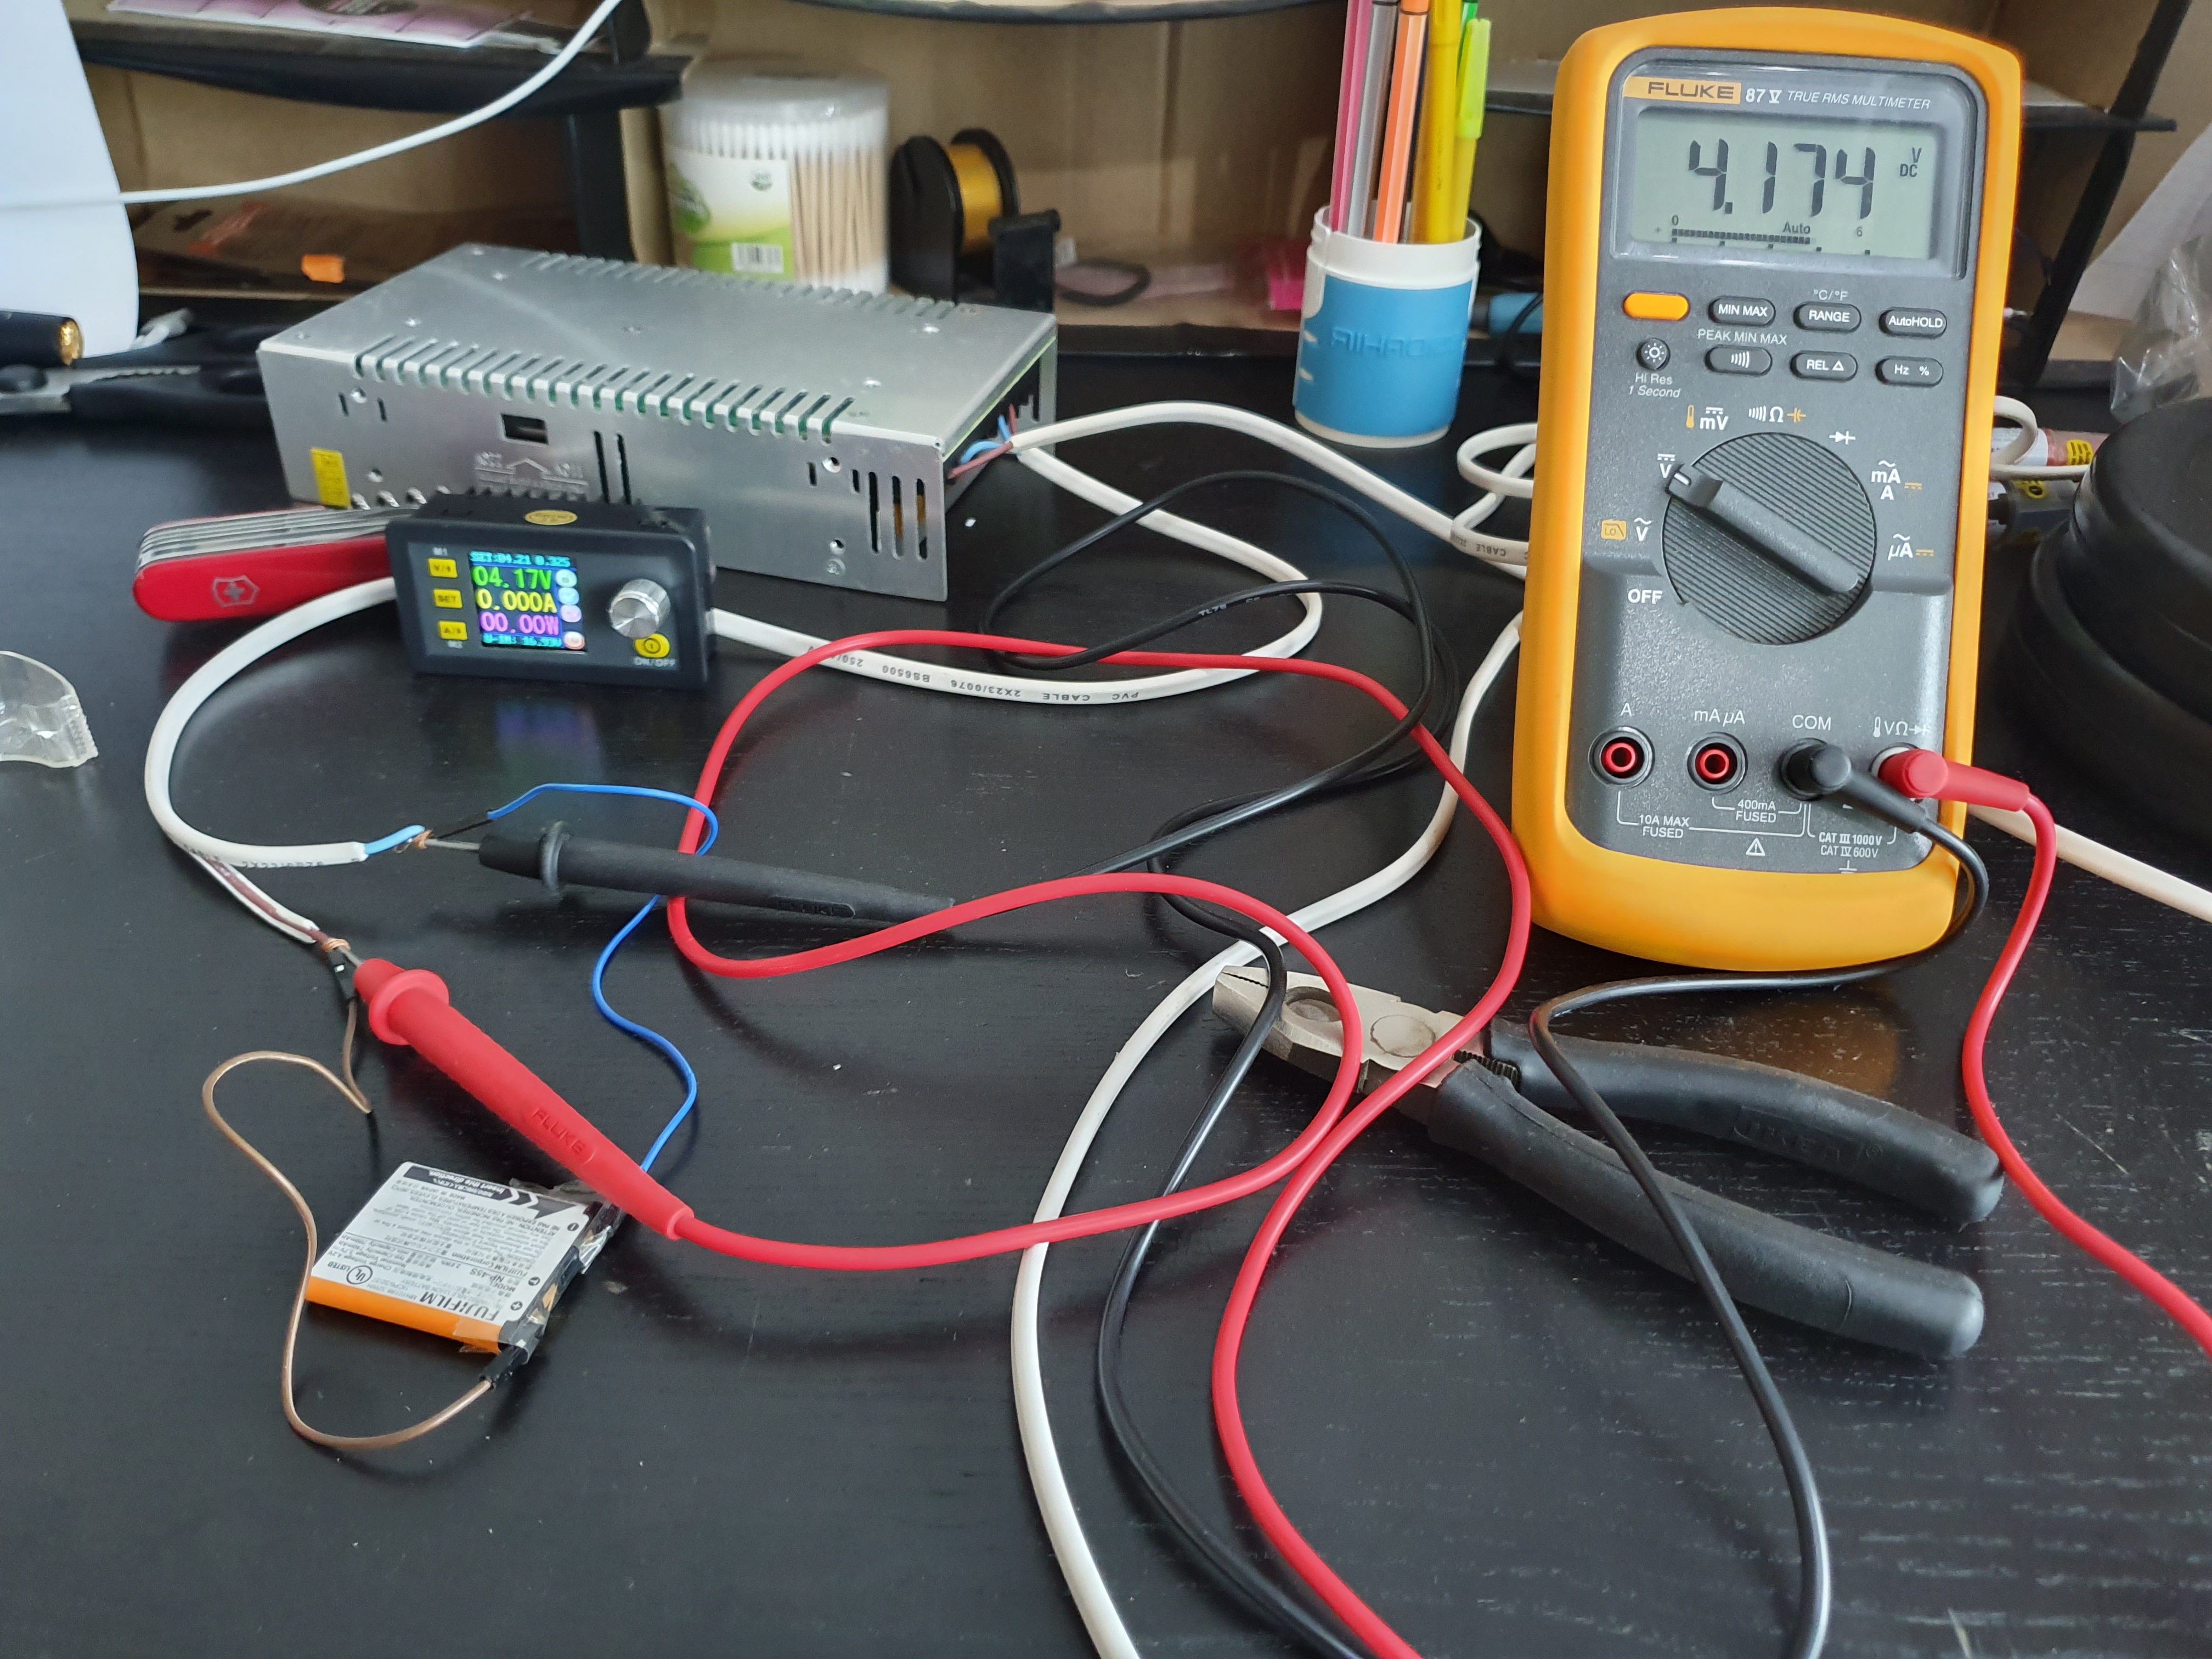
Works like a charm. We've got the supply tuned to the charging voltage, with a current limit of 325 mA. Looks good, and checking the voltage reveals it's a little off (meter reads 0.01V higher), but close enough for our needs. We'll add a multimeter to be sure, since I don't trust closed circuit voltage with this battery or this supply just yet.

(I've since discovered (top comment here)) that the inaccuracy is partly due to temperature, and that the module has a little calibration mode you can use to get better output. Awesome!)
And we're away!
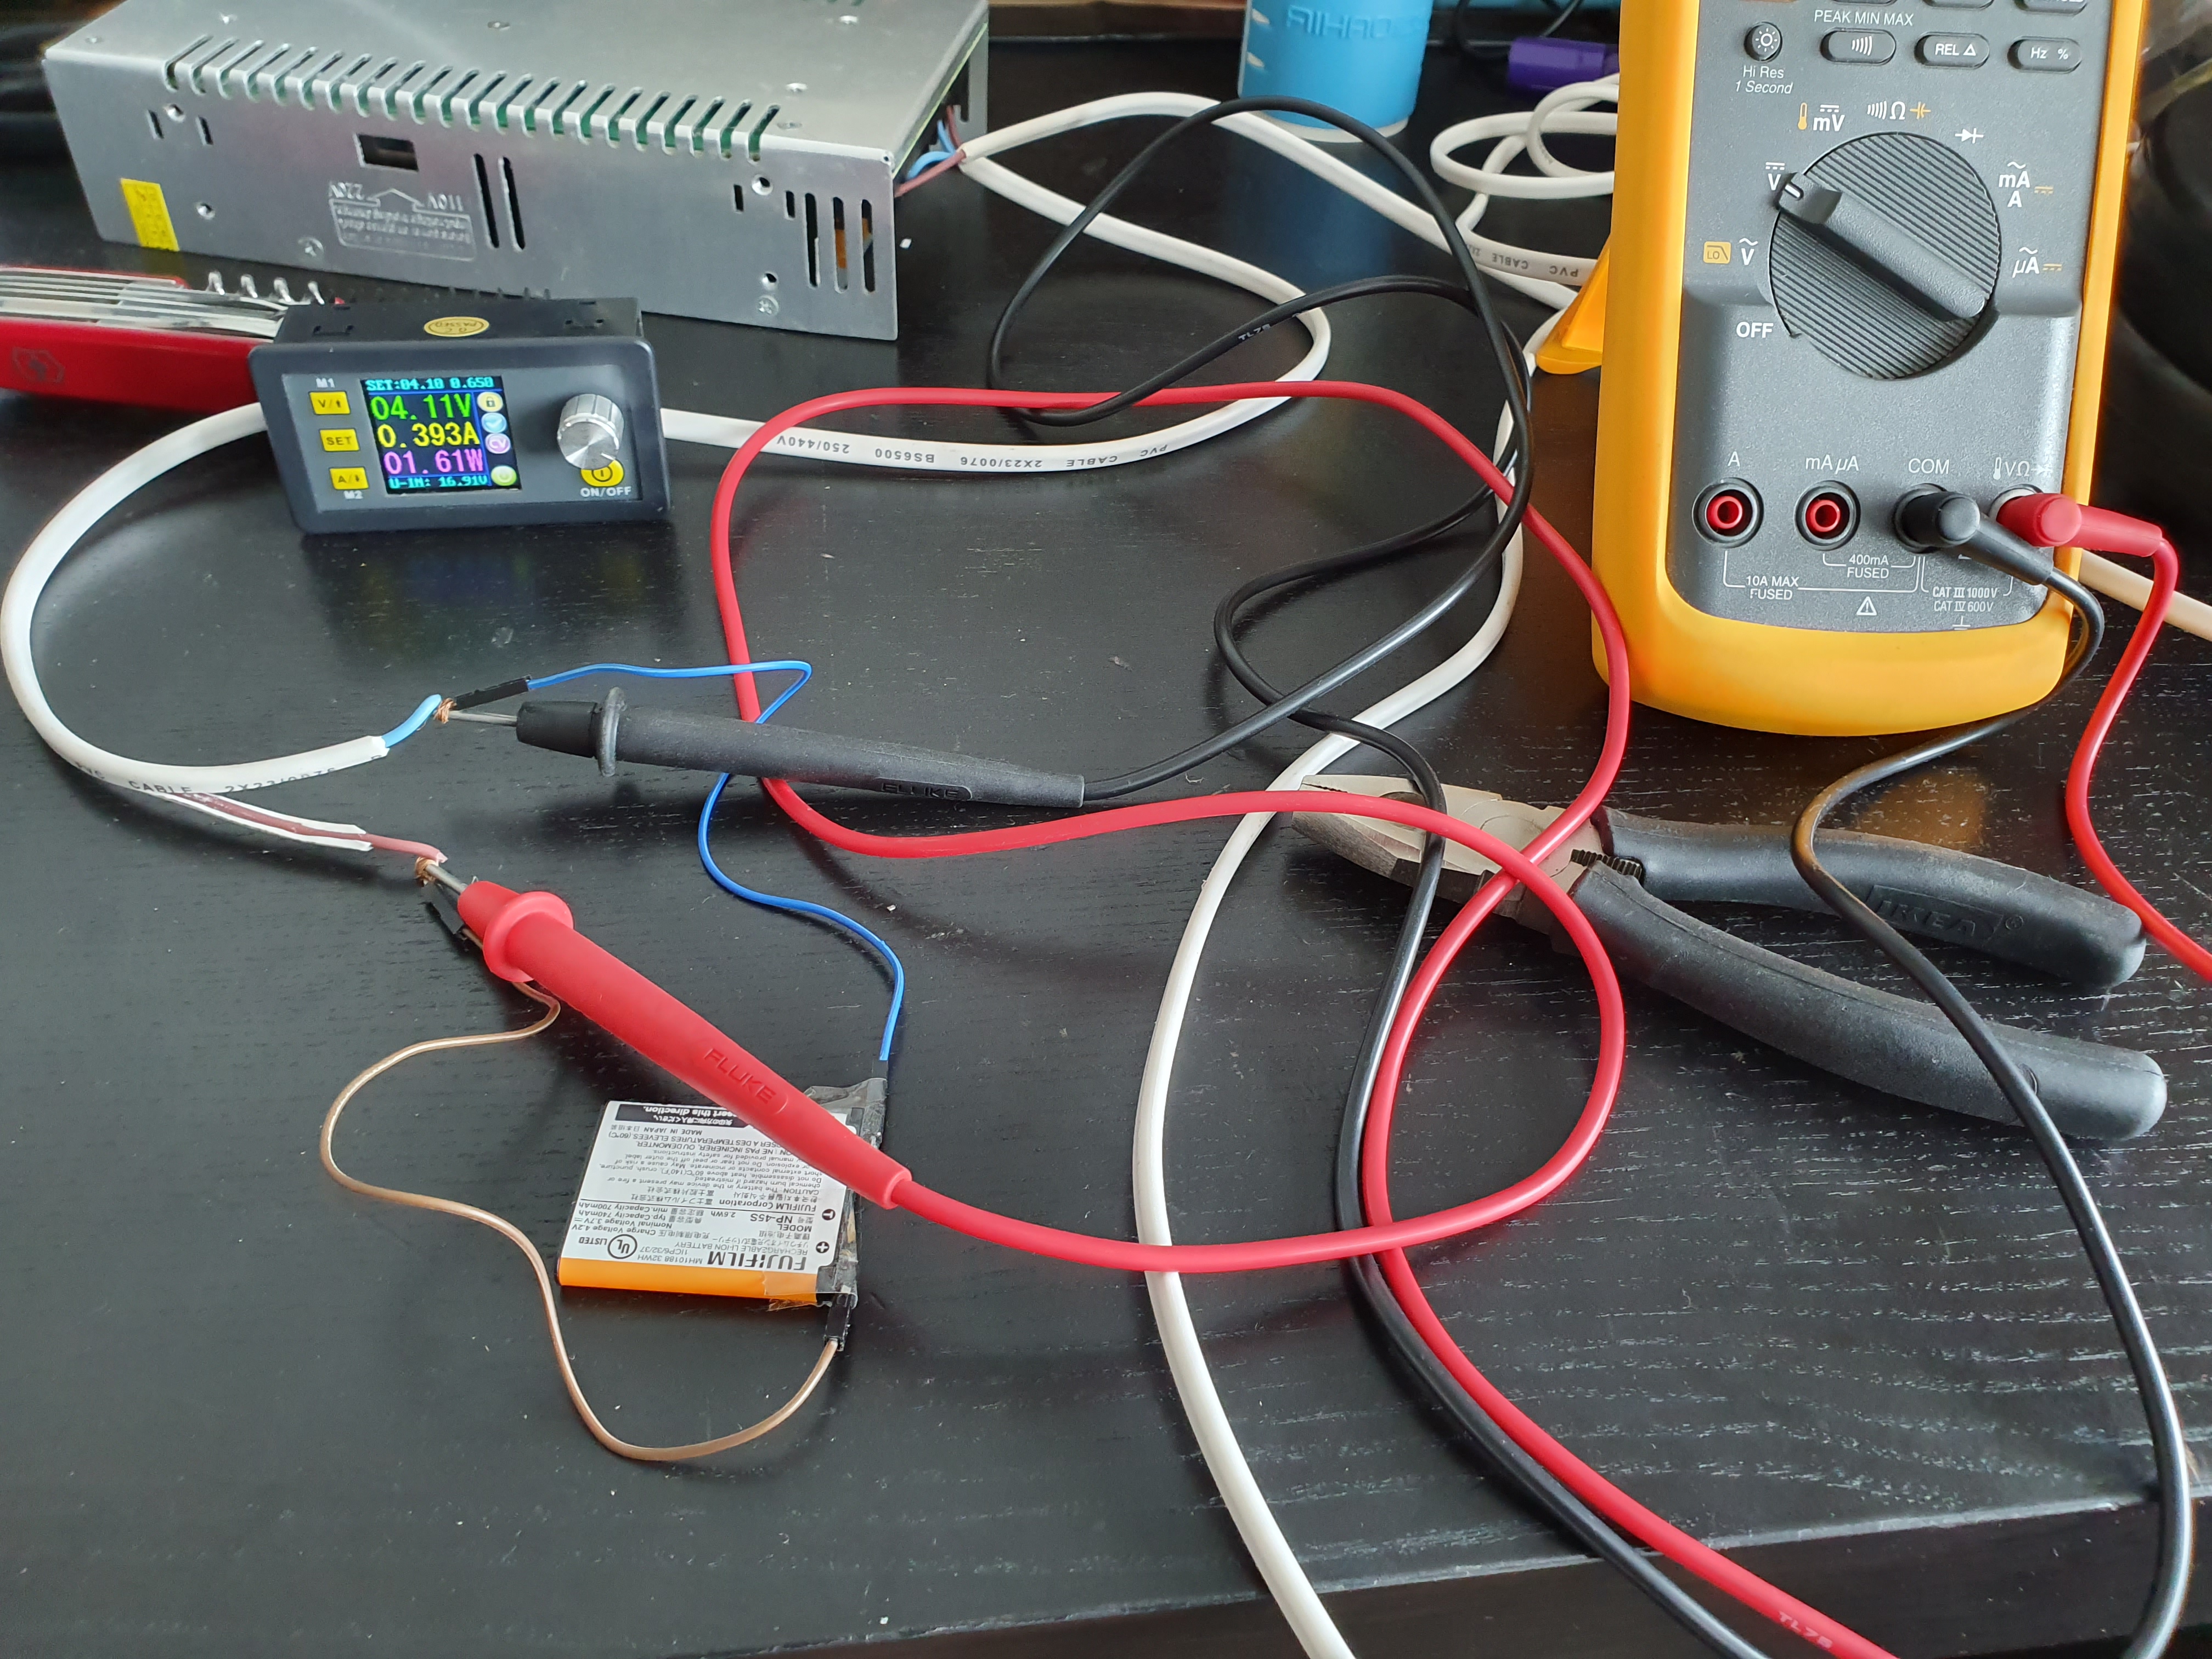
If you'll look close you can see the (CC) label on the display, indicating that we're in Constant Current mode. Look good, and the voltage is rising steadily. We'll leave it here for a little while. I'd ideally have liked to also measure the current, but it doesn't seem right to disturb this precarious nest of wires to put the meter in series.
Looks good to pull up the charging current a little, since we're still well within spec here:
We're now in constant voltage, supplying slightly higher than the slow-charge current. Coming back in an hour, we can see that the bulk of the charging is done:
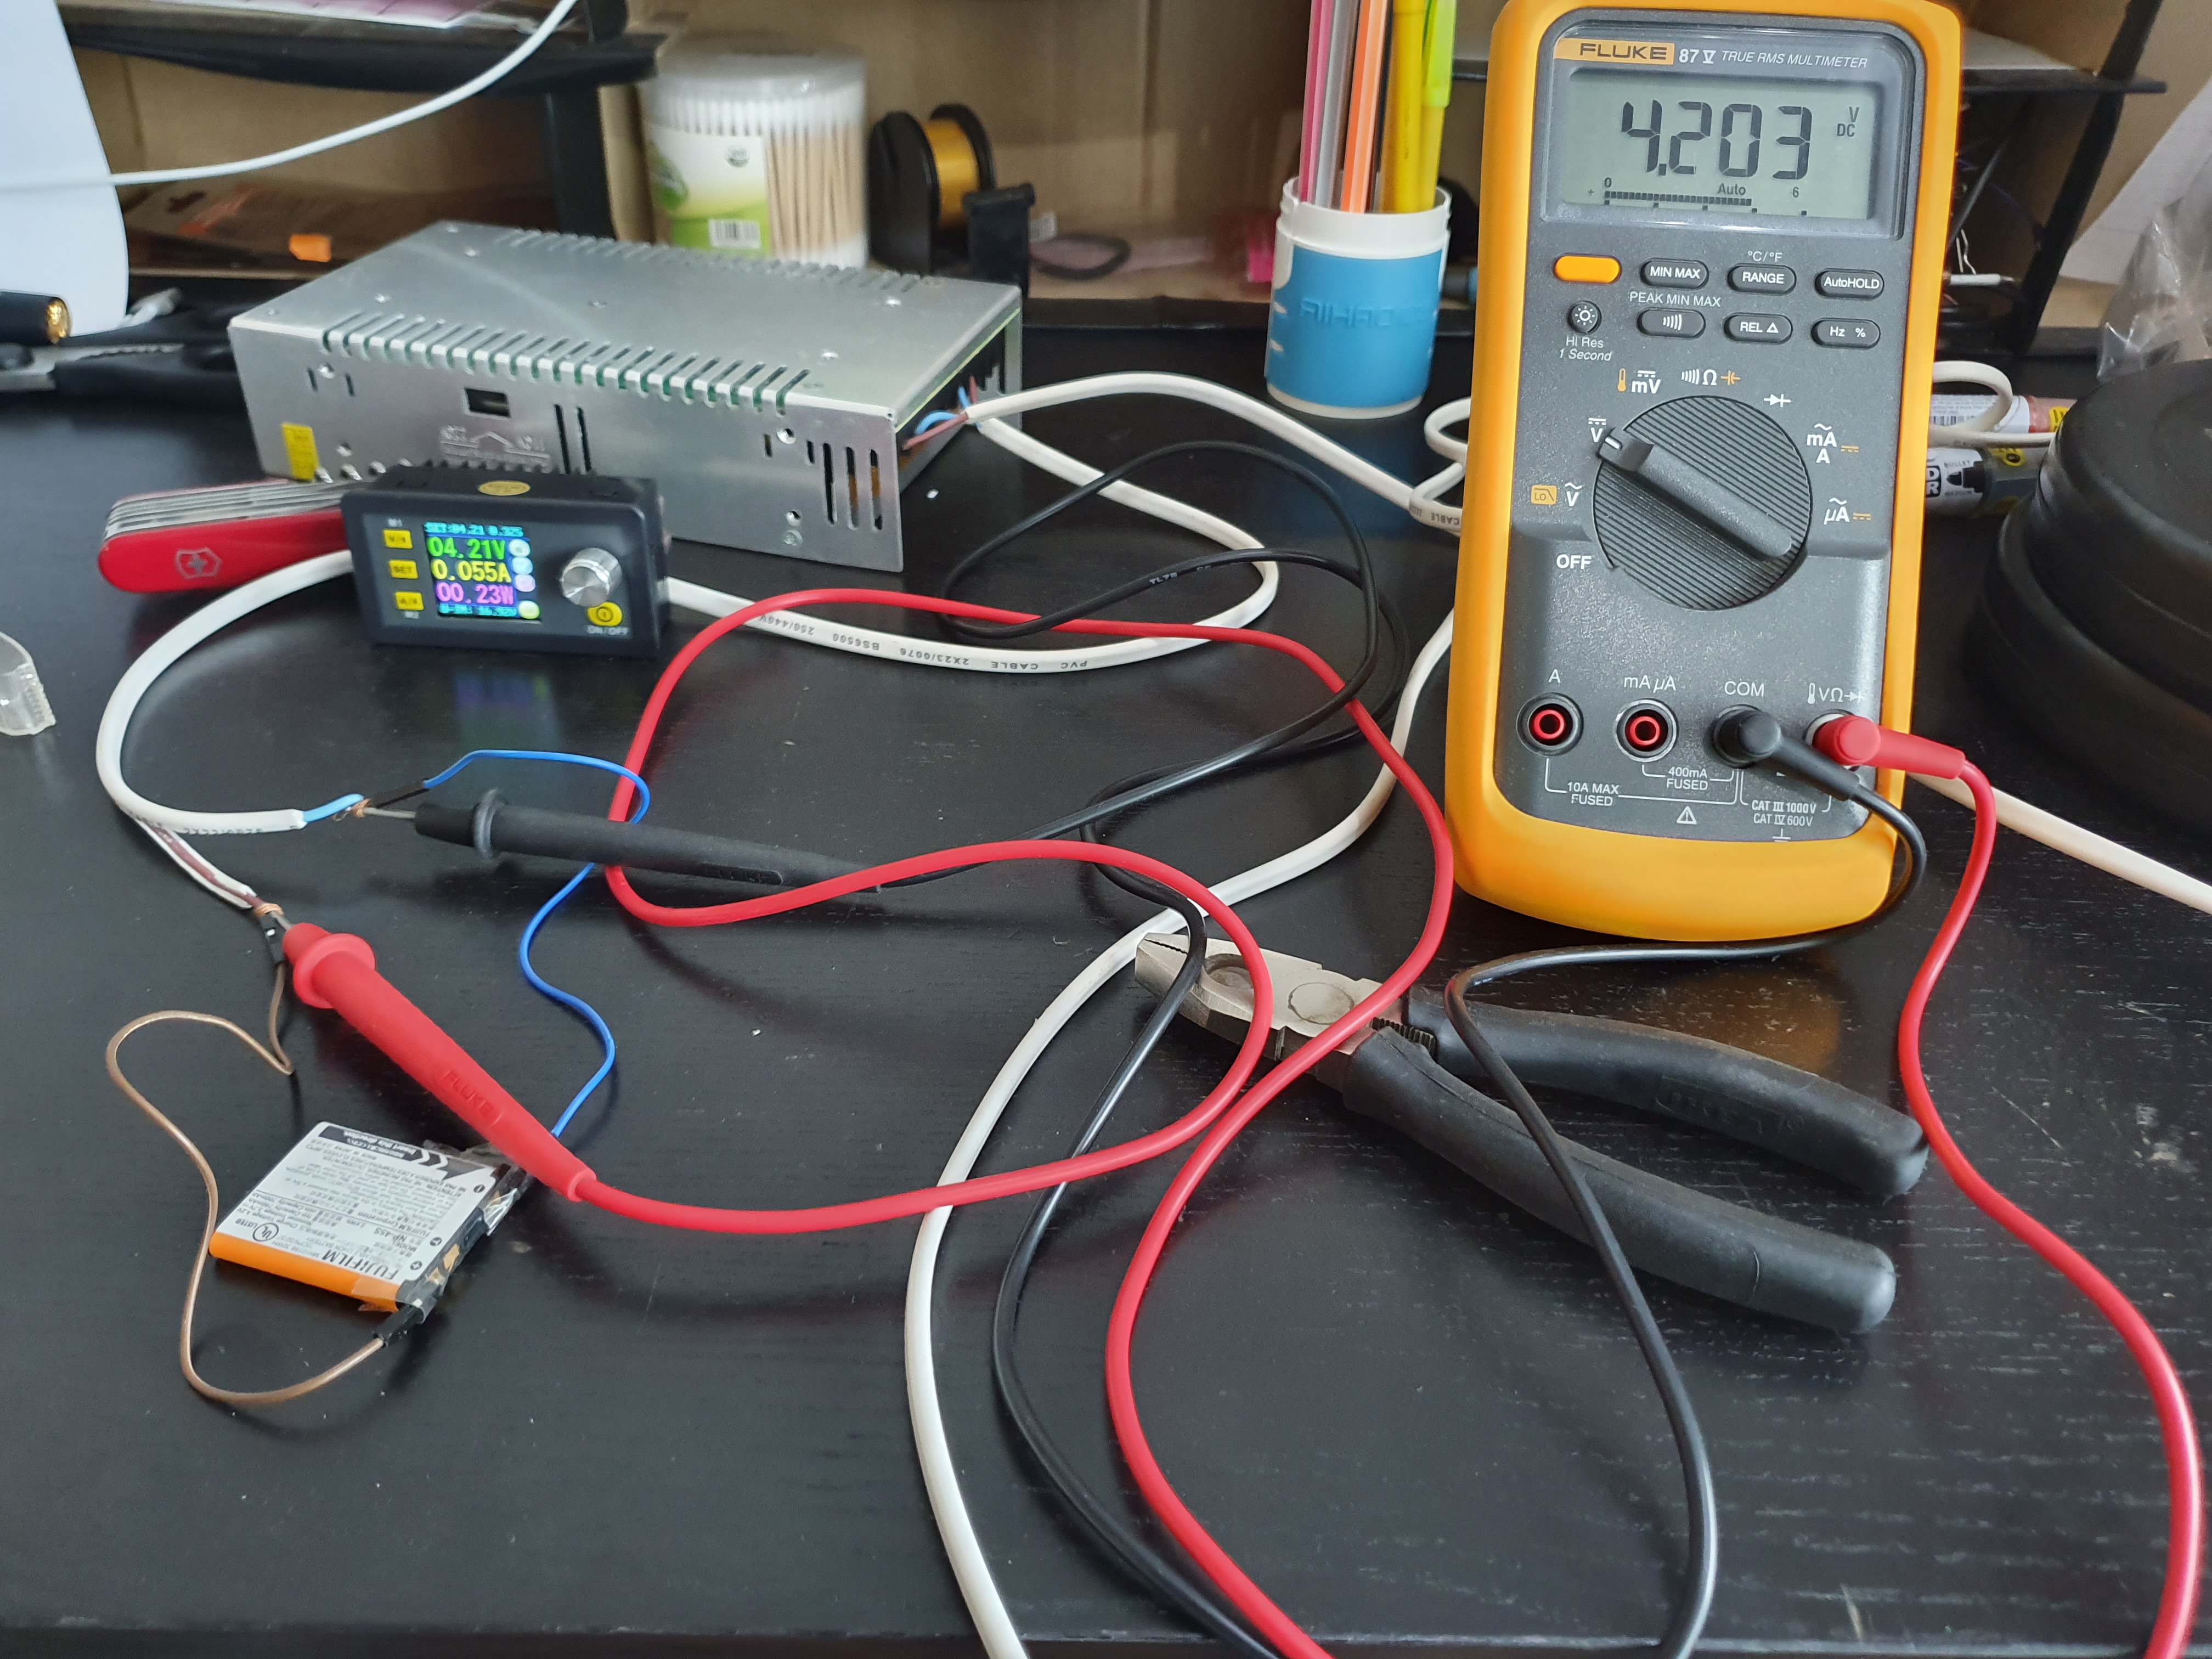
We're only putting about a quarter of a watt in. We leave it for a little longer, and check the open circuit voltage:
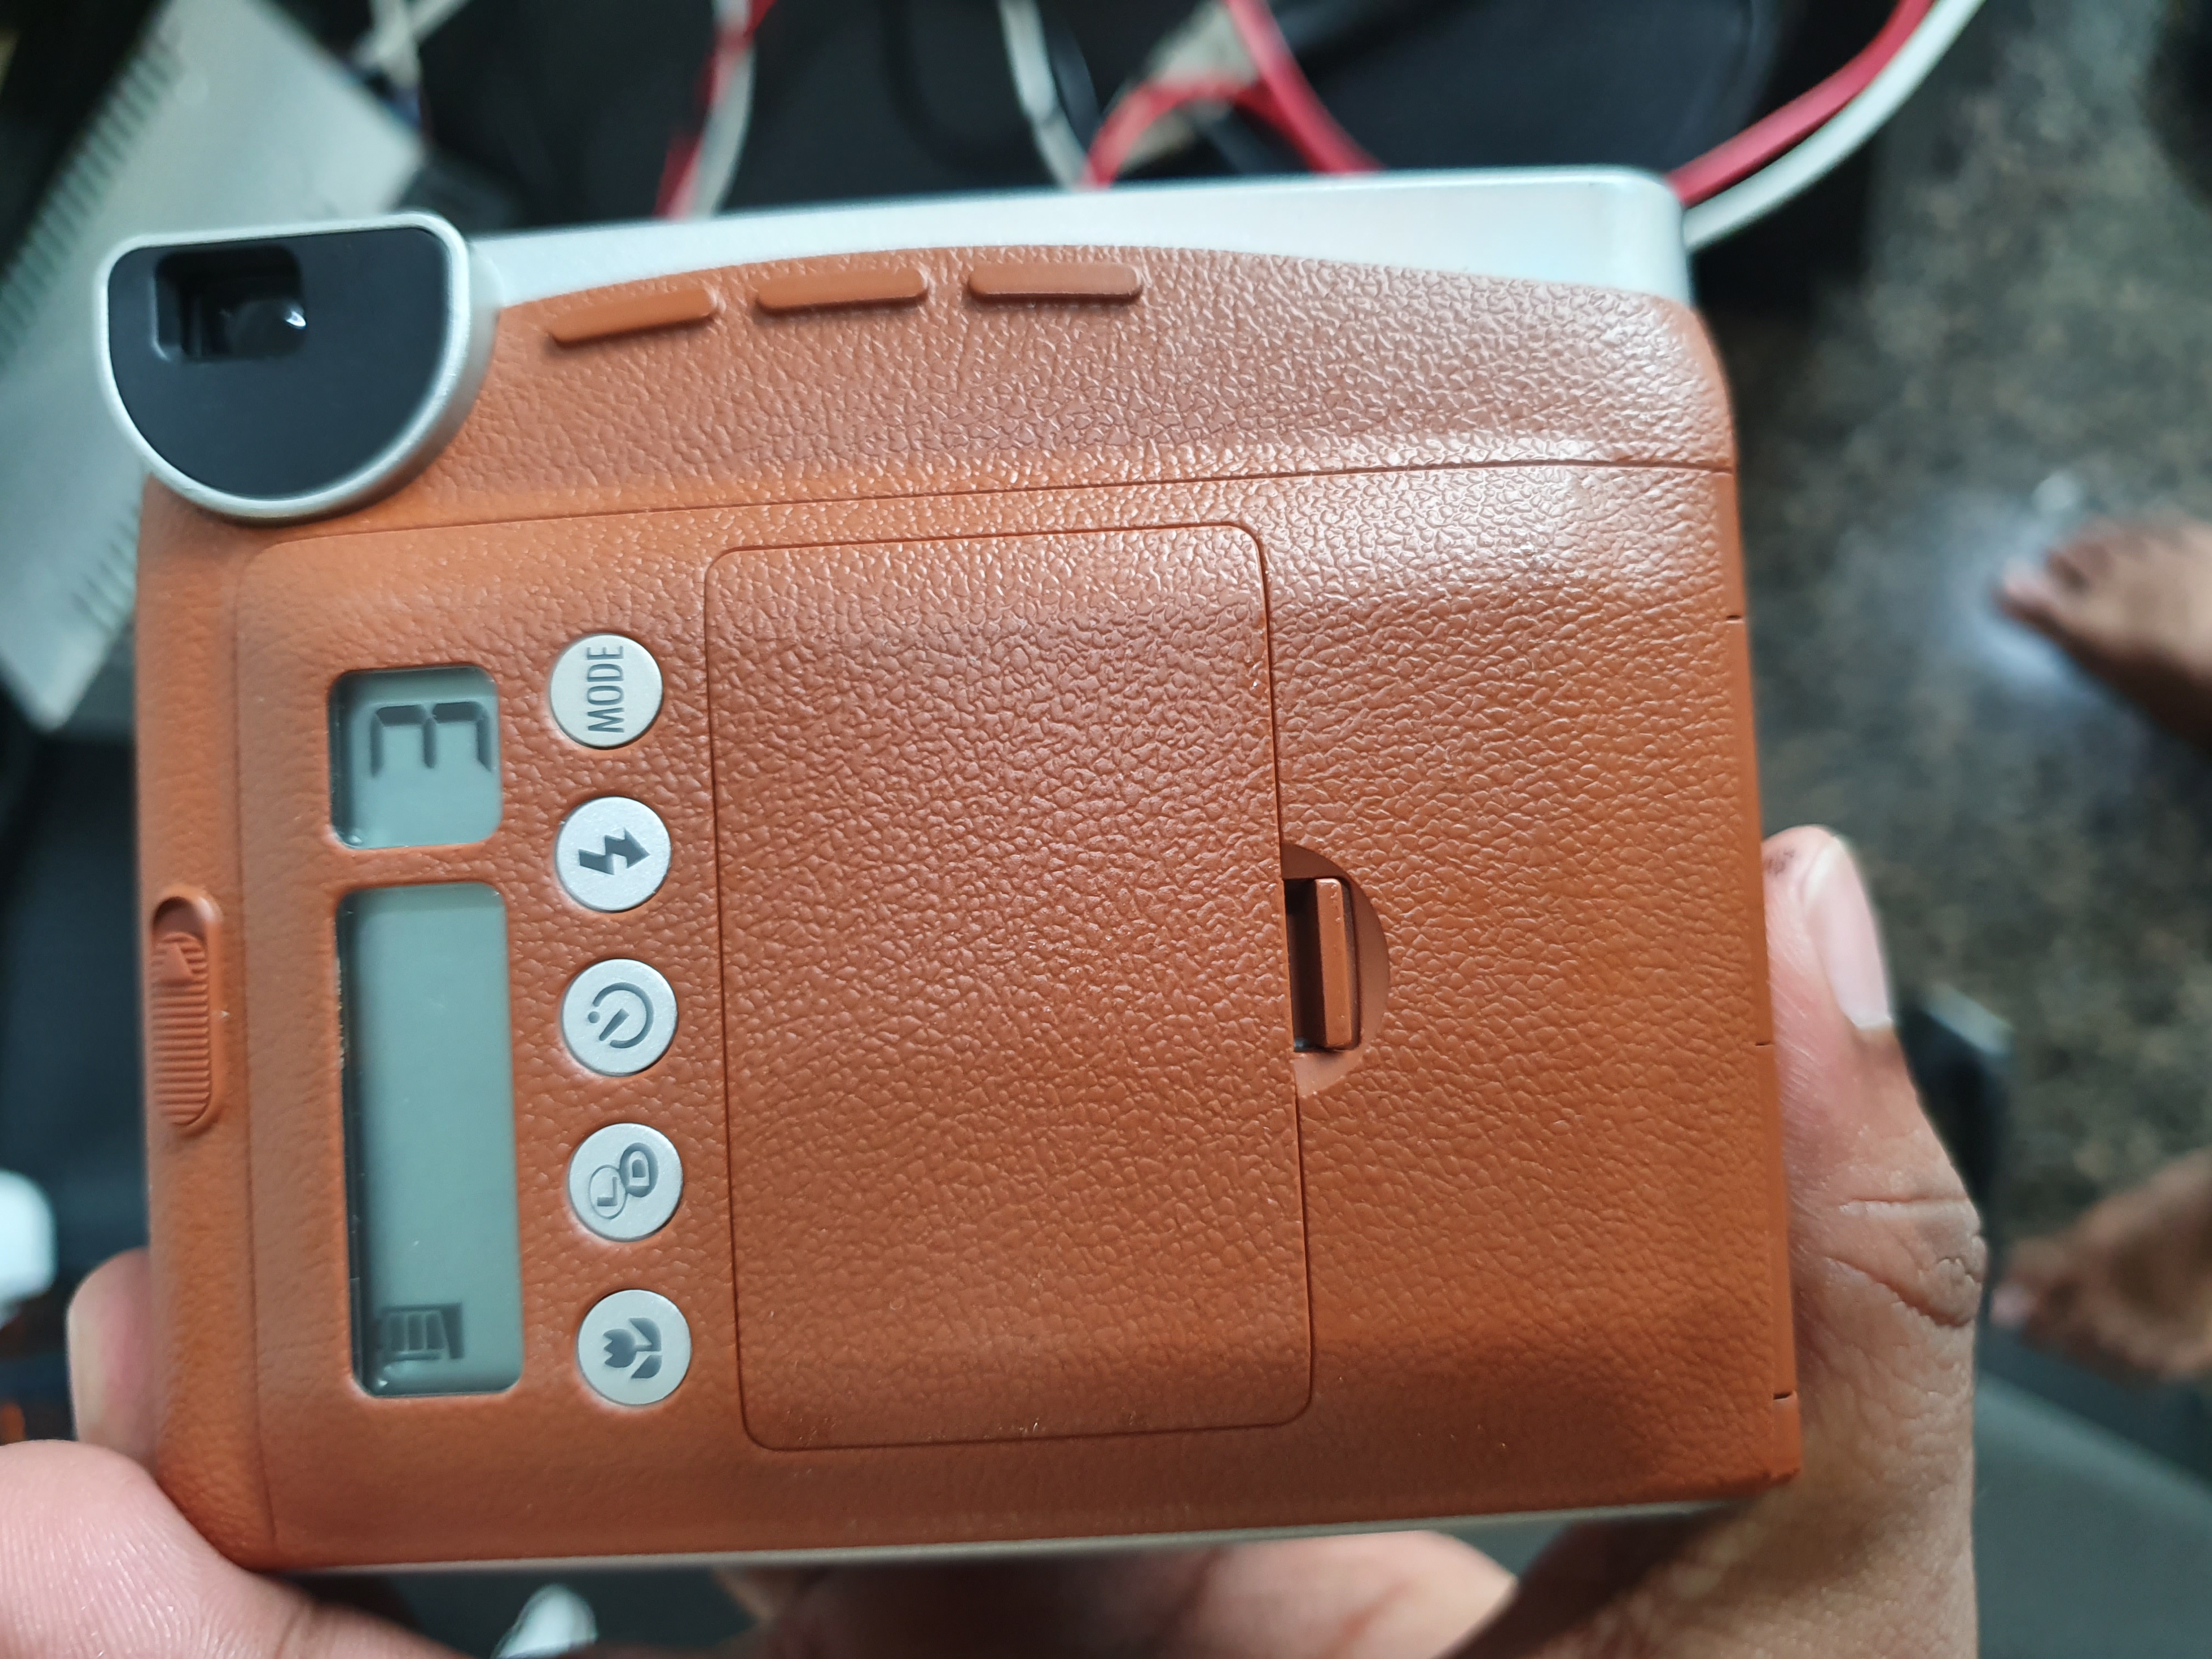
Looks good, I'd say we're done. Plugging the battery back into the camera, and it reads full.
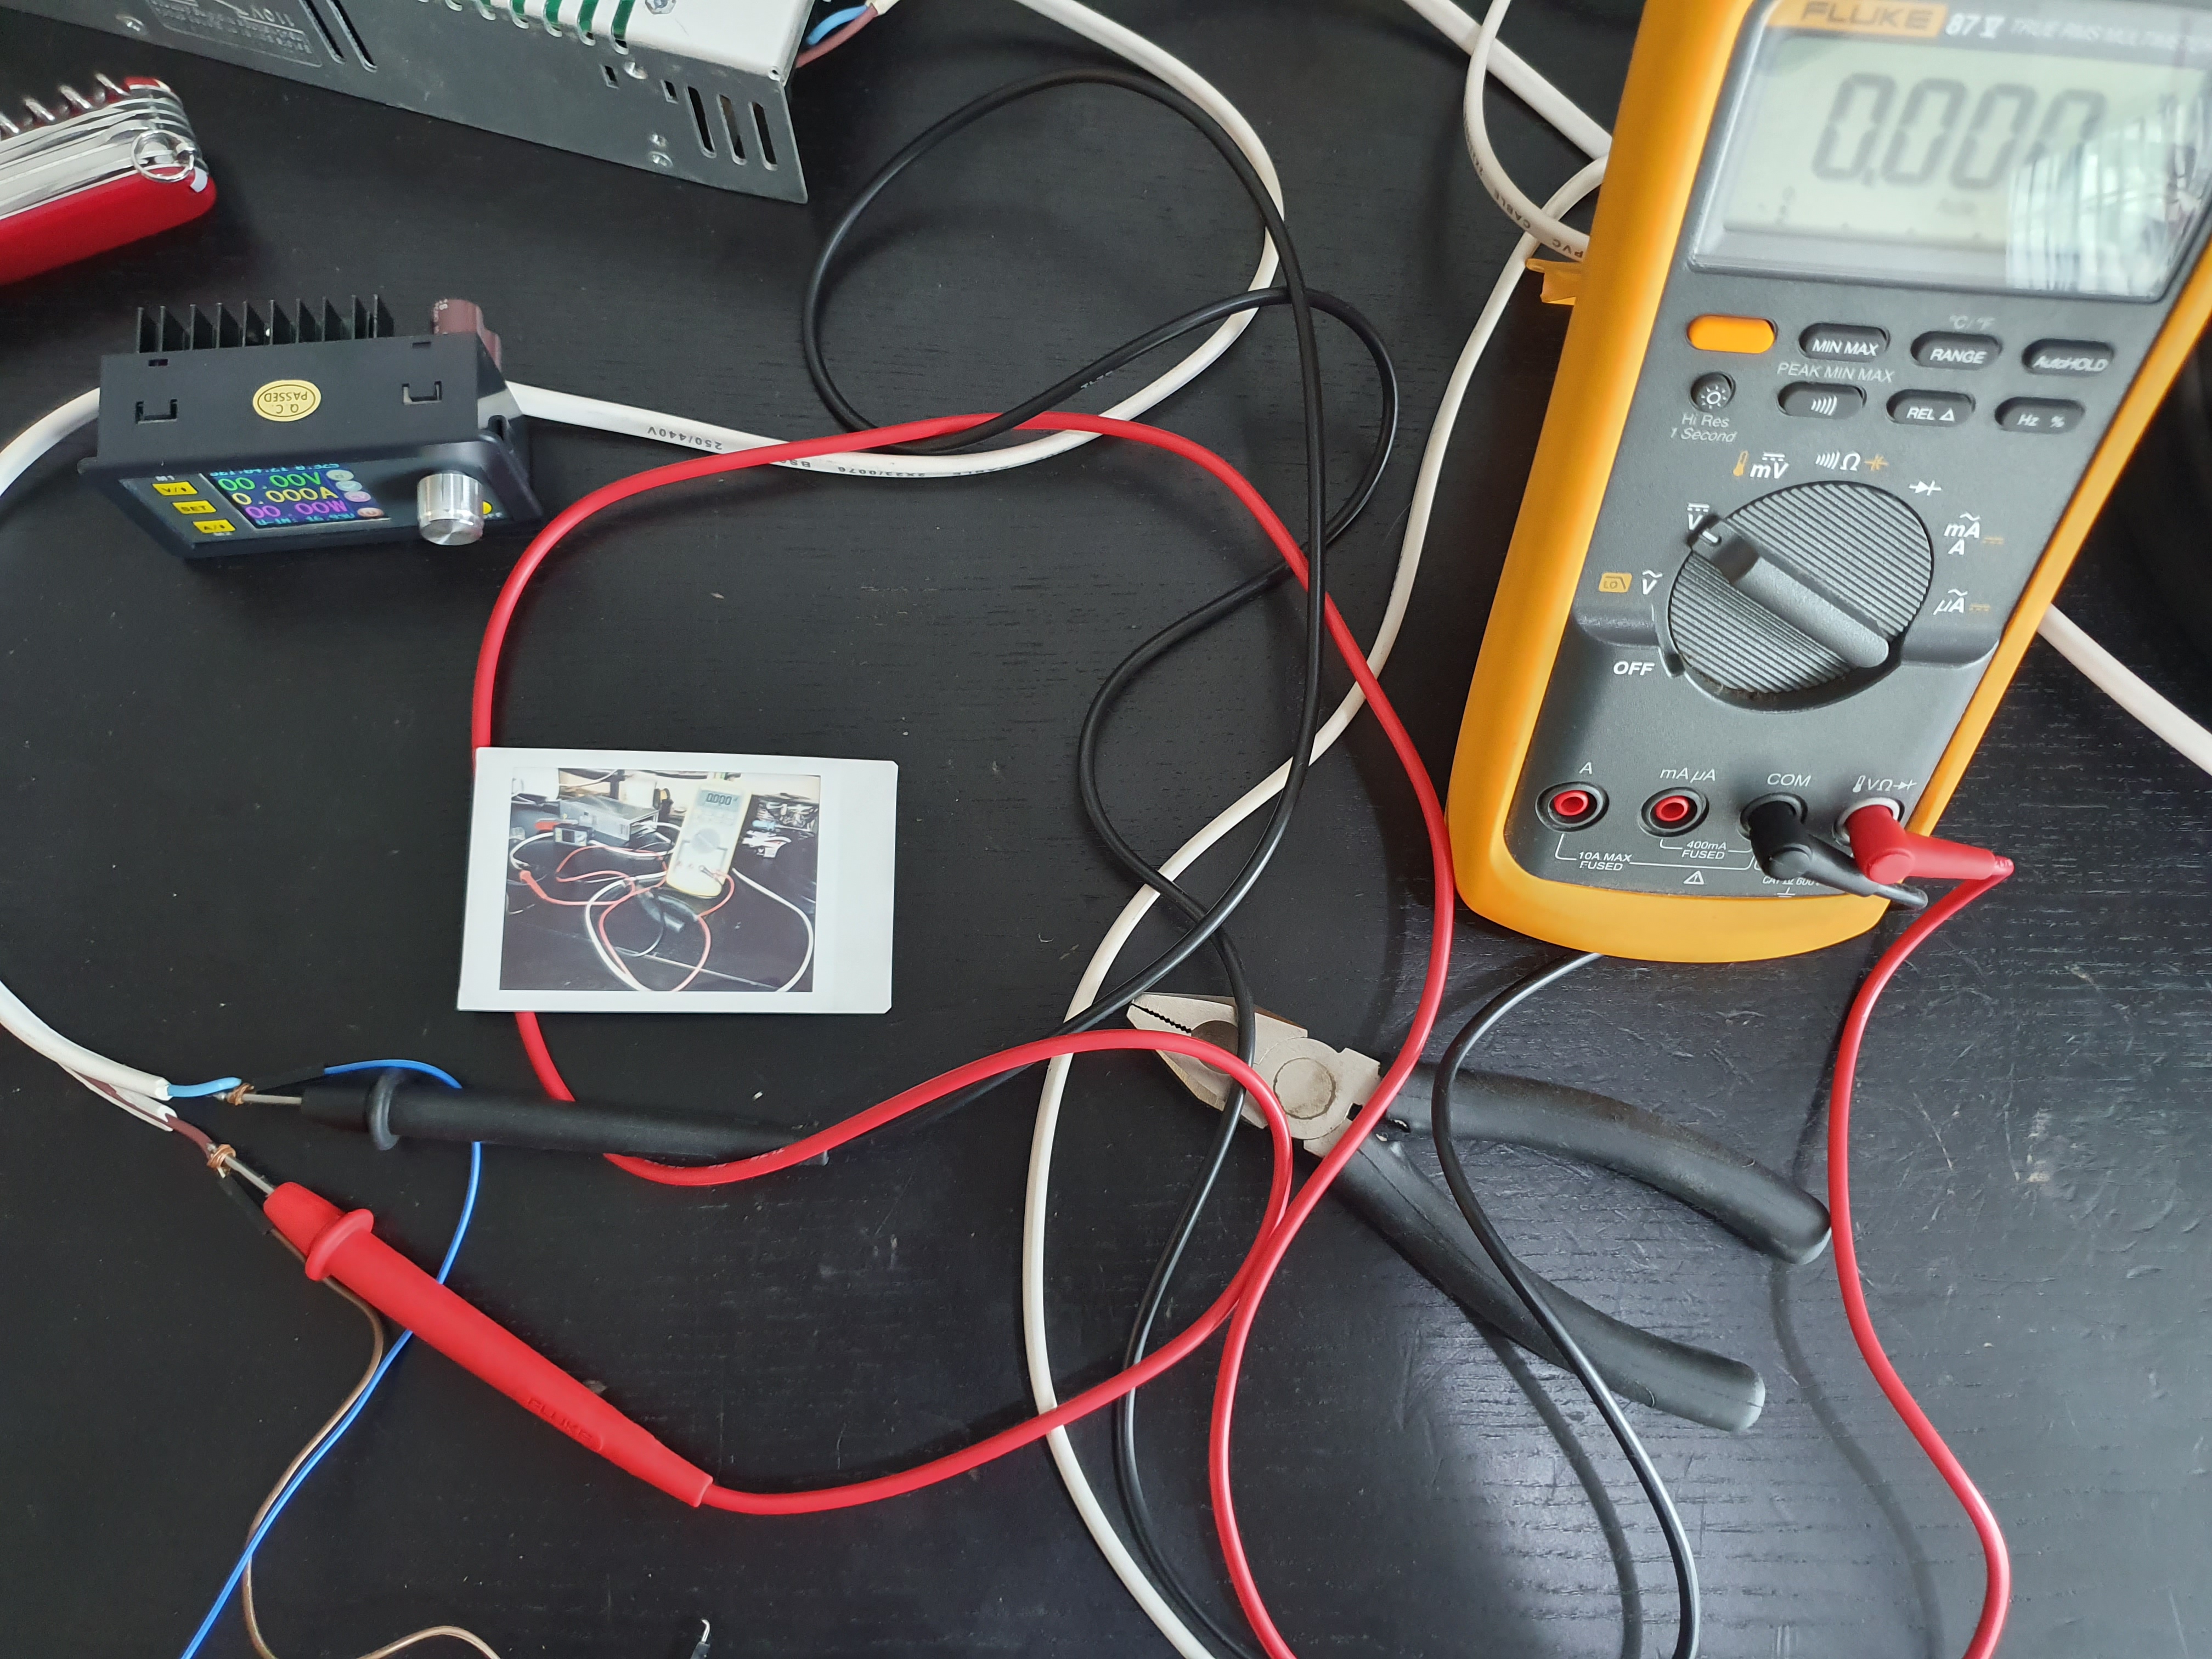
Let's add a picture to remember the occasion:
That's it, really. Once you've gotten used to the charge characteristics of these things, they feel a lot less scary and prone to explosion. Next step, I should try building my own charger so I can start including dirt-cheap Li-ion cells in my projects. Once you do that, they make a big difference. The energy densities are great, plus the ability to get most of the charge out before the voltage drops is something awesome.

Not a newsletter